Field Access Management: Step-by-Step Guide
Overview
Field Access Management allows clients to organize user roles and field assignments hierarchically using Sets and Tags. This system improves access control and permissions management, making it easier to manage large and complex field trials.
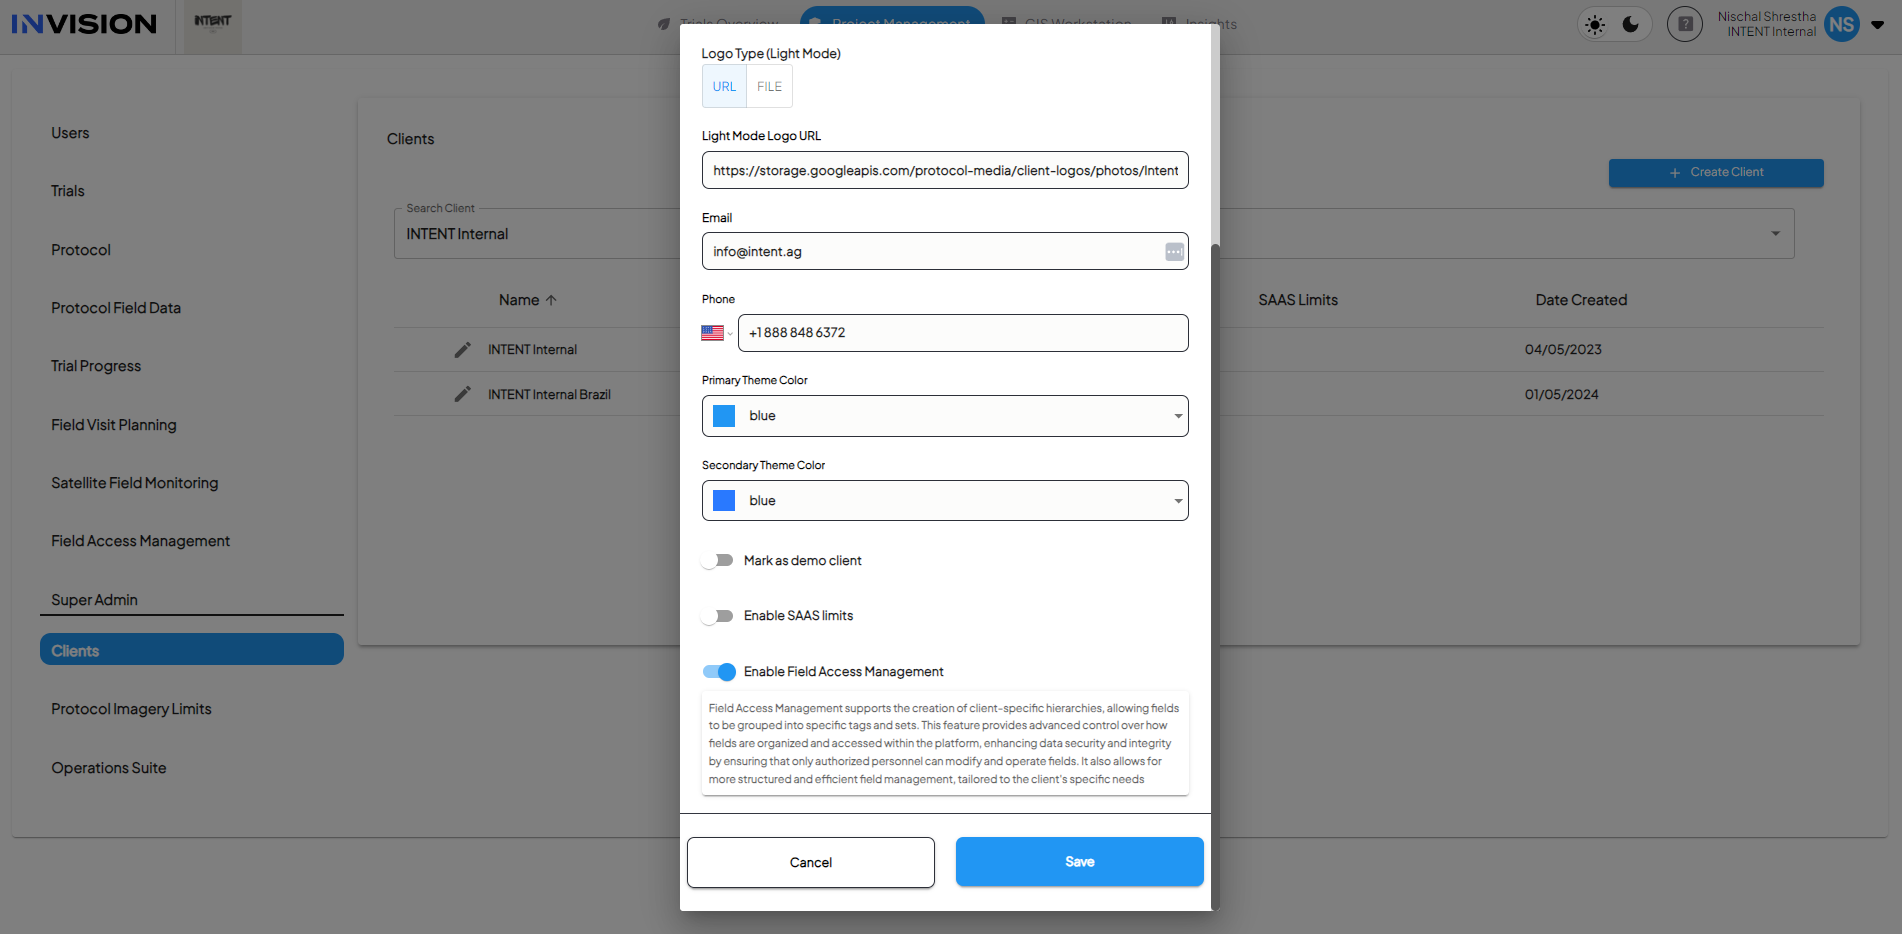
Step 1: Enable Field Access Management for a Client
- Login to INVISION - Project Management.
- Navigate to the Client Management section.
- Select the Client you want to enable Field Access Management for.
- Enable the 'Field Access Management' Flag.
- This will make the Field Access Management options available for all trials under this client.
 This is the only part where super-admins need to configure. Rest of the setup can be done by other admin roles.
- This will make the Field Access Management options available for all trials under this client.

Step 2: Create a Set
What is a set?
What is it?
- Set: A collection of Tags assigned to a trial. A Set groups related Tags under a single organizational structure, such as a company hierarchy or regional grouping.
Use and Where it Works
- A Set allows clients to organize and manage multiple Tags, providing a streamlined way to control access and permissions across different trials.
- Navigate to Project Management.
- Go to Field Access Management.
- Click on 'Create Set'.
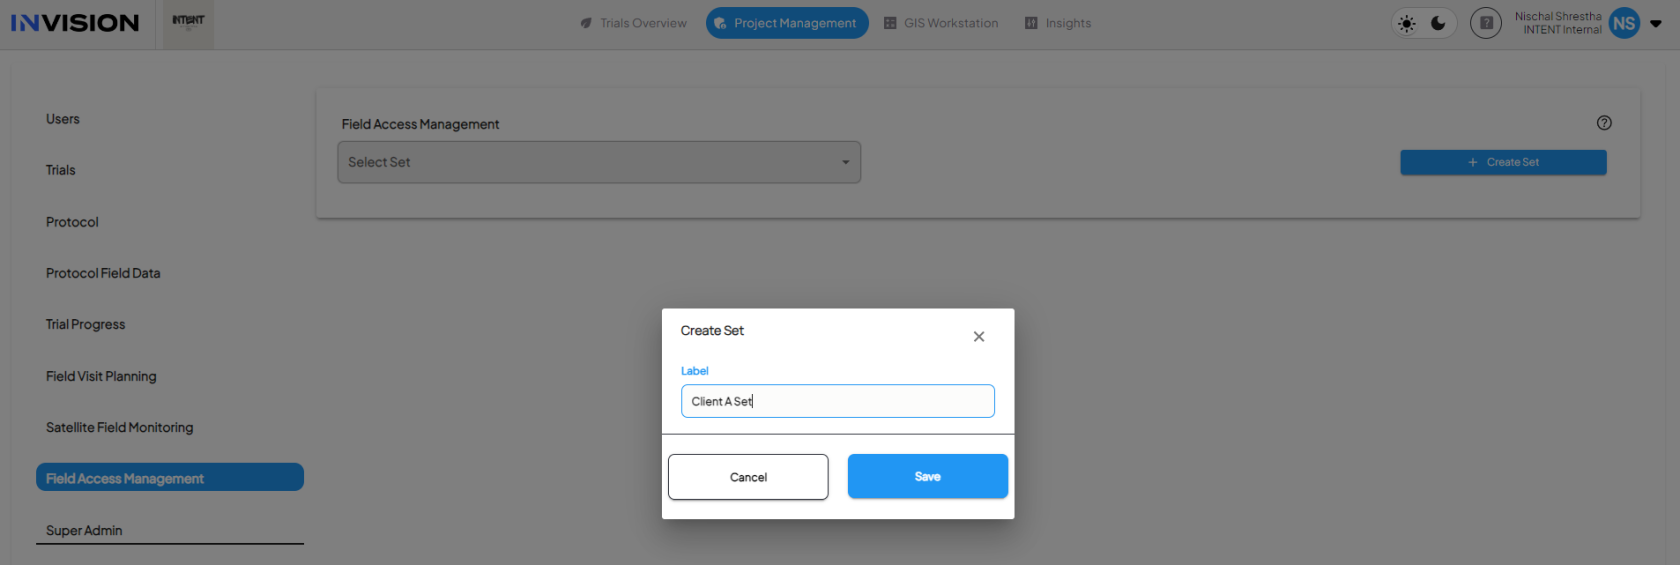
- Fill in the Set Details:
- Label: Name the set (e.g., Client A Hierarchy).
- Save the Set.

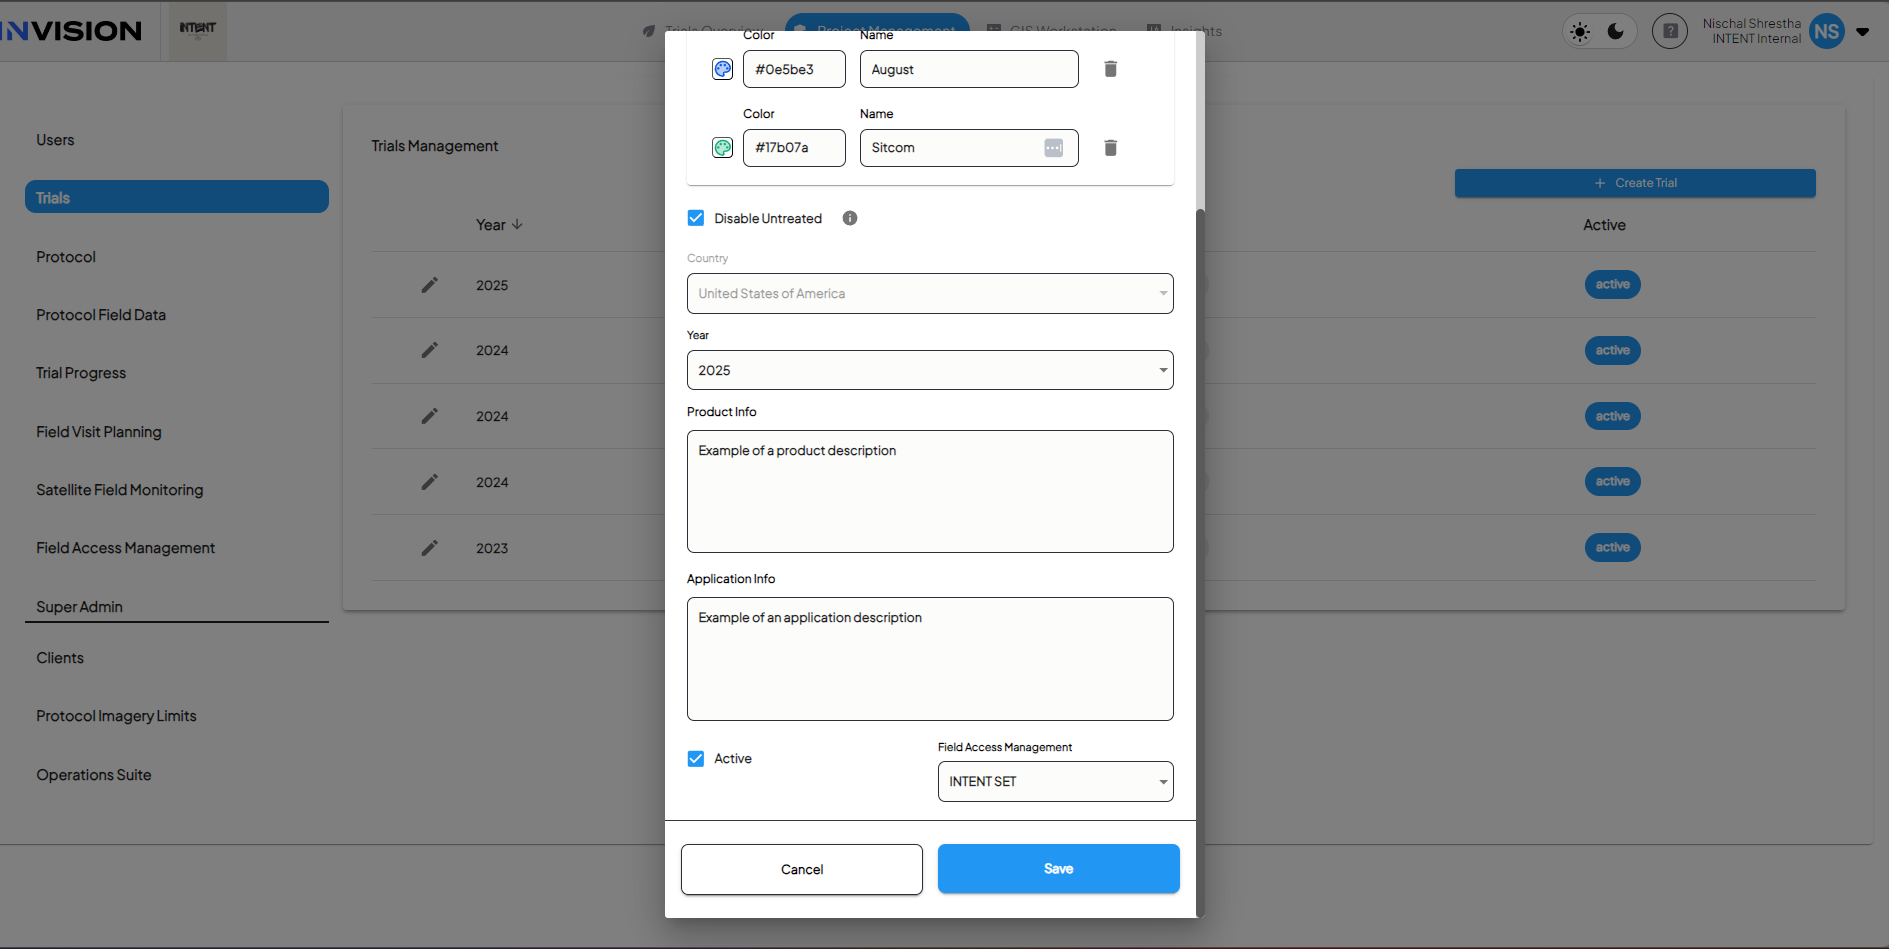
Step 3: Assign the Set to a Trial
- Navigate to Trials.
- Select the Trial you want to assign the set to.
- Open the Field Access Management Tab.
- Select the Set from the dropdown.

- Save the Trial Settings.
Step 4: Create Tags
What is a tag?
What is it?
- Tag: Represents a collection of enrolled fields within a Set. Tags can be associated with specific groups (retailers/coops), regions, or roles within the organization.
Use and Where it Works
- Tags allow for granular control of access and permissions, ensuring that users can only access fields relevant to their role or region.
- Go to Field Access Management.
- Select the Set you want to add tags to.
- Click on 'New Tag'.
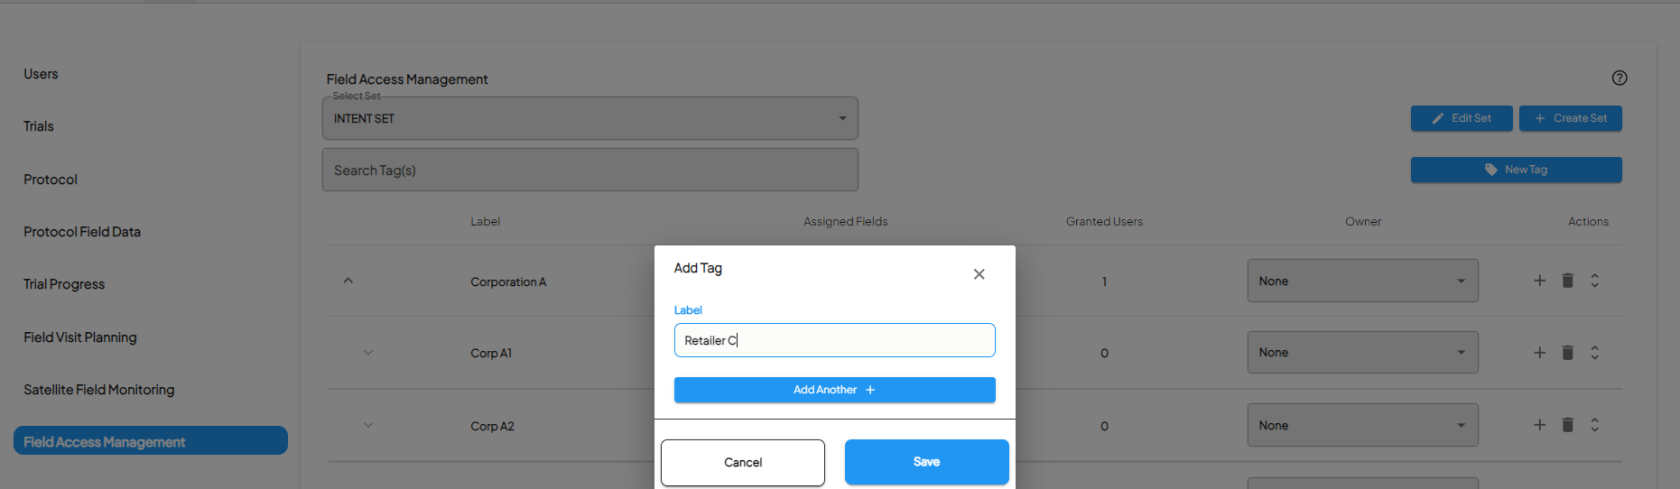
- Fill in the Tag Details:
- Label: Name the tag (e.g., Retailer A).
- Owner ID (Optional): Assign an owner to the tag.
- Save the Tag.

Step 5: Assign Users to Tags
What does this do?
What is it?
- Assigning users to Tags allows specific users to have access to the fields and data associated with those Tags.
Use and Where it Works
- This ensures that users have appropriate access to fields based on their assigned tags.
- Navigate to Field Access Management.
- Select the Set containing the tags.
- Select the Tag you want to assign users to.
- Click on the number on 'Granted Users'.

- Move Users (Trial Operatives) from the list to assign to the tag.
- Save the Assignments.

Step 6: Grant Ownership to Tags (Optional)
- On the Owner drop down on the Tag you want to assign an owner to.
- Assign an Owner by selecting a user from the dropdown.
Step 7: Create Sub-Tags
What is a sub-tag?
What is it?
- Sub-Tag: A nested tag within a parent tag, allowing for further granularity in access control and organization.
Use and Where it Works
- Sub-Tags enable more detailed and specific organization within a broader Tag, useful for complex hierarchies.
How to Create Sub-Tags
Step 9: Managing Tags
Step 10: Utilize the System
- Monitor Access and Permissions:
- Users will see fields and other users associated with their assigned tags.
- Permissions are regulated based on the tags assigned to the users.
- Trial Operative Management:
- Assign roles to trial operatives.
- Ensure operatives have access to the correct fields and trials.
Additional Notes:
- Maximum Sub-Tag Levels: The maximum allowed depth of 3 levels for sub-tags. Please adjust your selections accordingly.
- Sort Tags: Use the sort feature to organize tags and sub-tags for better visibility.
Conclusion
Field Access Management provides a robust framework for managing field trials with hierarchical structures. By following these steps, you can efficiently set up and manage Sets and Tags, ensuring proper access control and permissions for all users involved in the trial.
Field Enrollment Guide
Overview
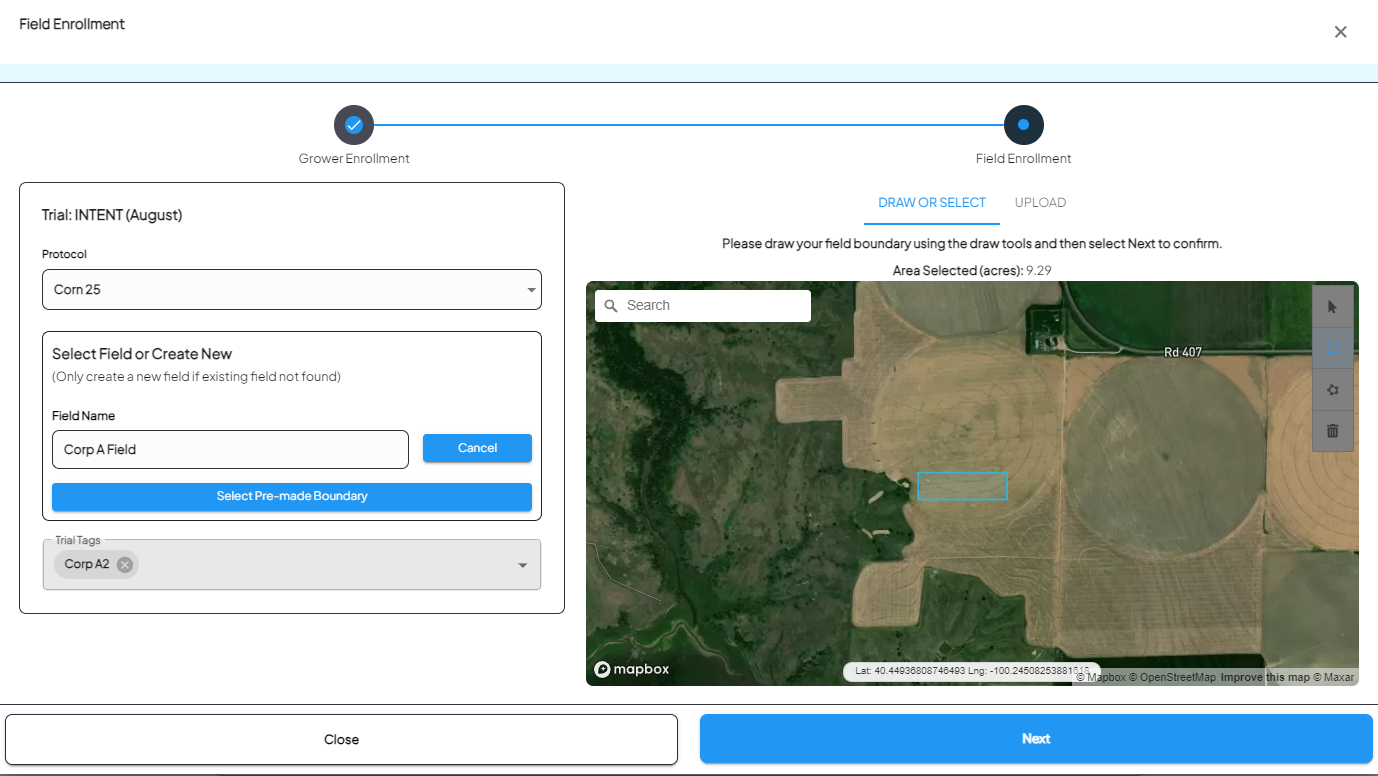
Field Enrollment is the process of assigning fields to specific Tags within a Set. This allows users who are assigned to those Tags to see and manage the fields accordingly.
Steps to Enroll a Field and Assign a Tag

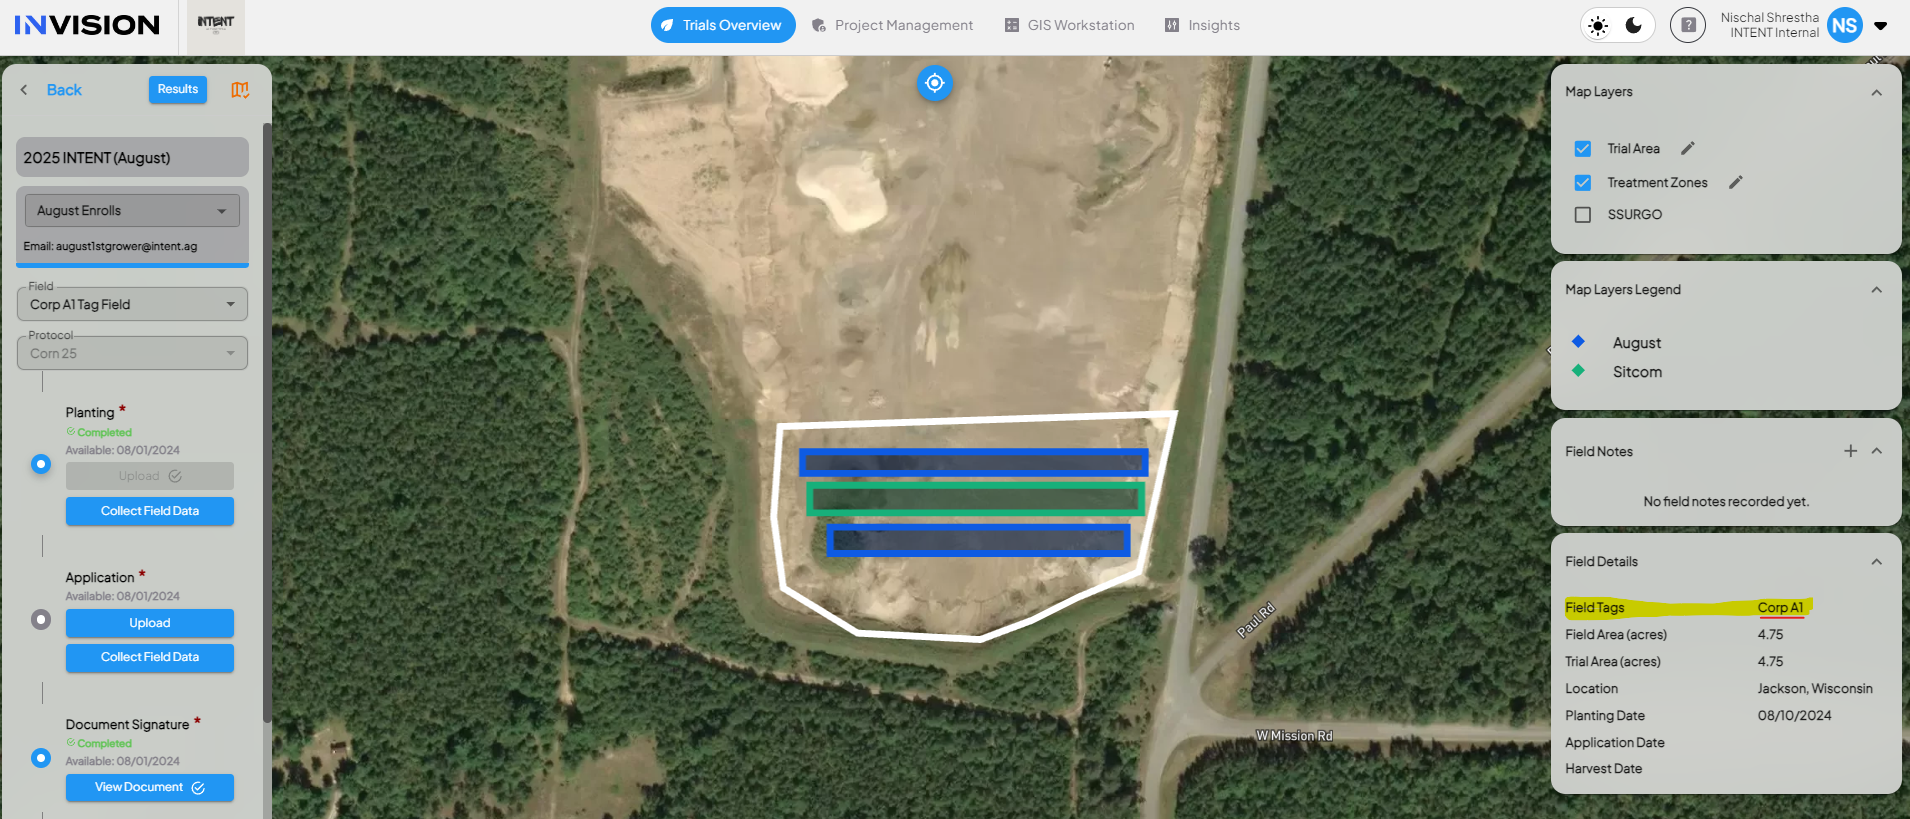
User (Trial Operatives) Access to Enrolled Fields
Trial Operatives assigned to Tags can access fields associated with those Tags. This ensures that users can only see and manage fields for which they have been granted access through their assigned Tags.
Example: Using Field Access Management for a Retailer
Scenario
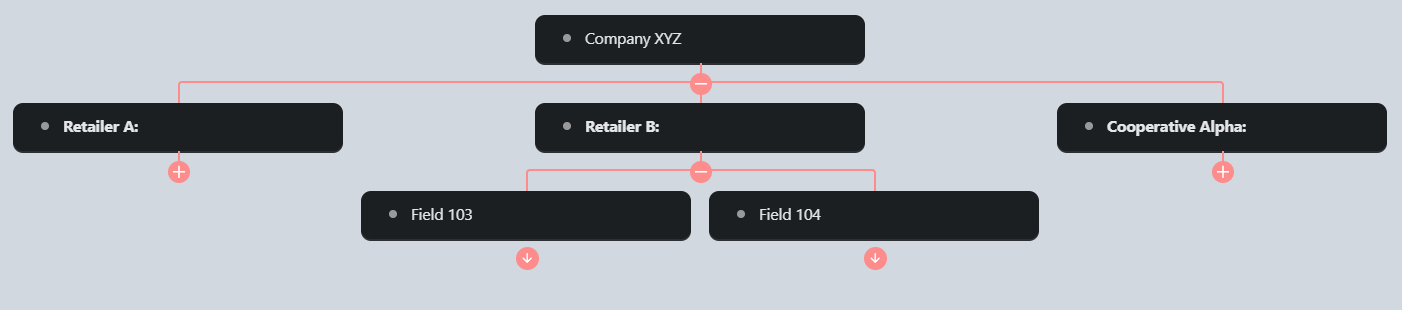
Let's consider a client, "FarmCo," which has a complex organizational structure that includes multiple retailers. They want to use Field Access Management to streamline access and permissions for their field trials.
Objective: Organize access for two retailers, "Retailer X" and "Retailer Y," under the "2024 Corn Trial" to ensure only relevant users have access to specific fields.
Implementation
-
Enable Field Access Management:
- The admin enables Field Access Management for FarmCo in the INVISION Admin Panel.
-
Create a Set:
- The admin creates a set named "FarmCo Hierarchy" under the "2024 Corn Trial".
-
Create Tags for Retailers:
- Under the "FarmCo Hierarchy" set, the admin creates two tags: "Retailer X" and "Retailer Y".
-
Assign Users to Tags:
- The admin assigns users to the respective tags. For instance, users from "Retailer X" are assigned to the "Retailer X" tag, and users from "Retailer Y" are assigned to the "Retailer Y" tag.
-
Assign Fields to Tags:
- The admin assigns specific fields to each tag. For example, fields located in the northern region are assigned to "Retailer X," and fields in the southern region are assigned to "Retailer Y".
-
Grant Ownership to Tags:
- The admin designates an owner for each tag. The owner of "Retailer X" tag can manage users and fields within that tag, ensuring decentralized management.
-
Utilize the System:
- Users from "Retailer X" can only access fields and data assigned to the "Retailer X" tag. Similarly, users from "Retailer Y" have access only to their respective fields.
- The field operatives can perform their tasks without interference or access to unrelated data, ensuring data security and efficiency.
Outcome:
FarmCo now has a streamlined and hierarchical access control system where each retailer can only access and manage their respective fields. This ensures organized data management, enhanced security, and efficient field trial operations.
Feel free to reach out to our support team if you have any questions or need further assistance.