Understanding the Project Management Page
Guide to Understanding the Project Management Tab
The Project Management tab of the INVISION Platform is designed to give users access to all the tools they need to design and manage a trial. It's divided into several sections, outlined below.
Users
The Users section of Project Management is used to add users, edit user profiles, and to assign permissions.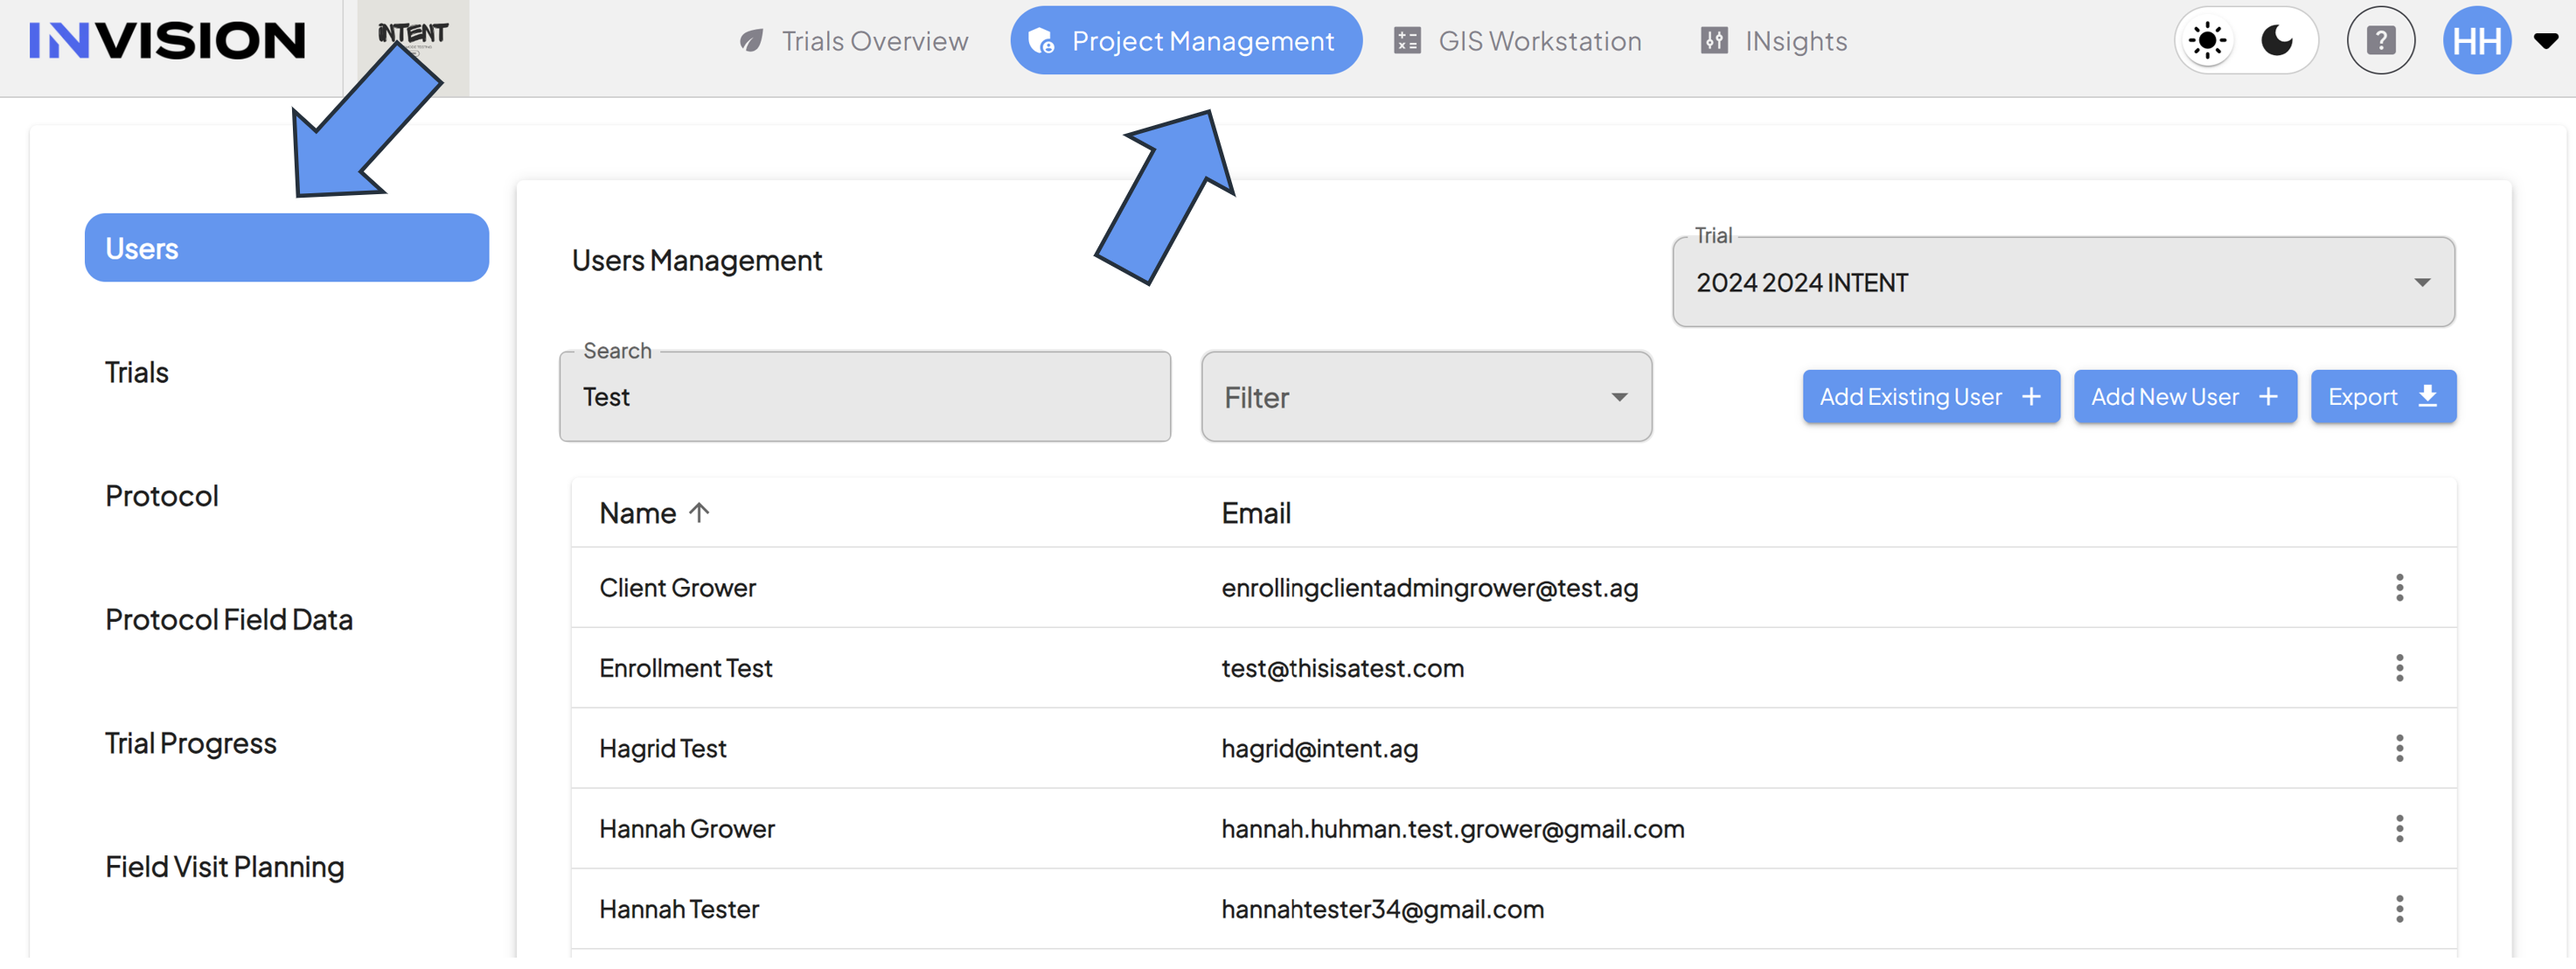
Components of the Users Section
- User Management
- Function: Displays a table containing users based on trial selection, search results, and/or specific filters that are applied.
- Trial Selection
- Function: Use this dropdown menu to see users associated with a specific trial.
- Search:
- Function: Search for users using first/last name or email address.
- Filter:
- Function: Use this filter to find users that have been assigned specific roles.
- Add Existing User:
- Function: Use this option to add users to a trial that you know are already in our system. For example, you would use this button to add a user from a previous trial to a new trial.
- Add New Users:
- Function: Use this option to add completely new users to a trial.
- Export:
- Function: Selecting this button will download a .csv file with all users, their contact information, and their role in our system.
- User Profile:
- Location: Select the three dots to the right of the user's email to pull up a menu.

- Function: This menu provides access to the following:
- User Details
- Assign Permissions
- Edit User
- Delete User
- Location: Select the three dots to the right of the user's email to pull up a menu.
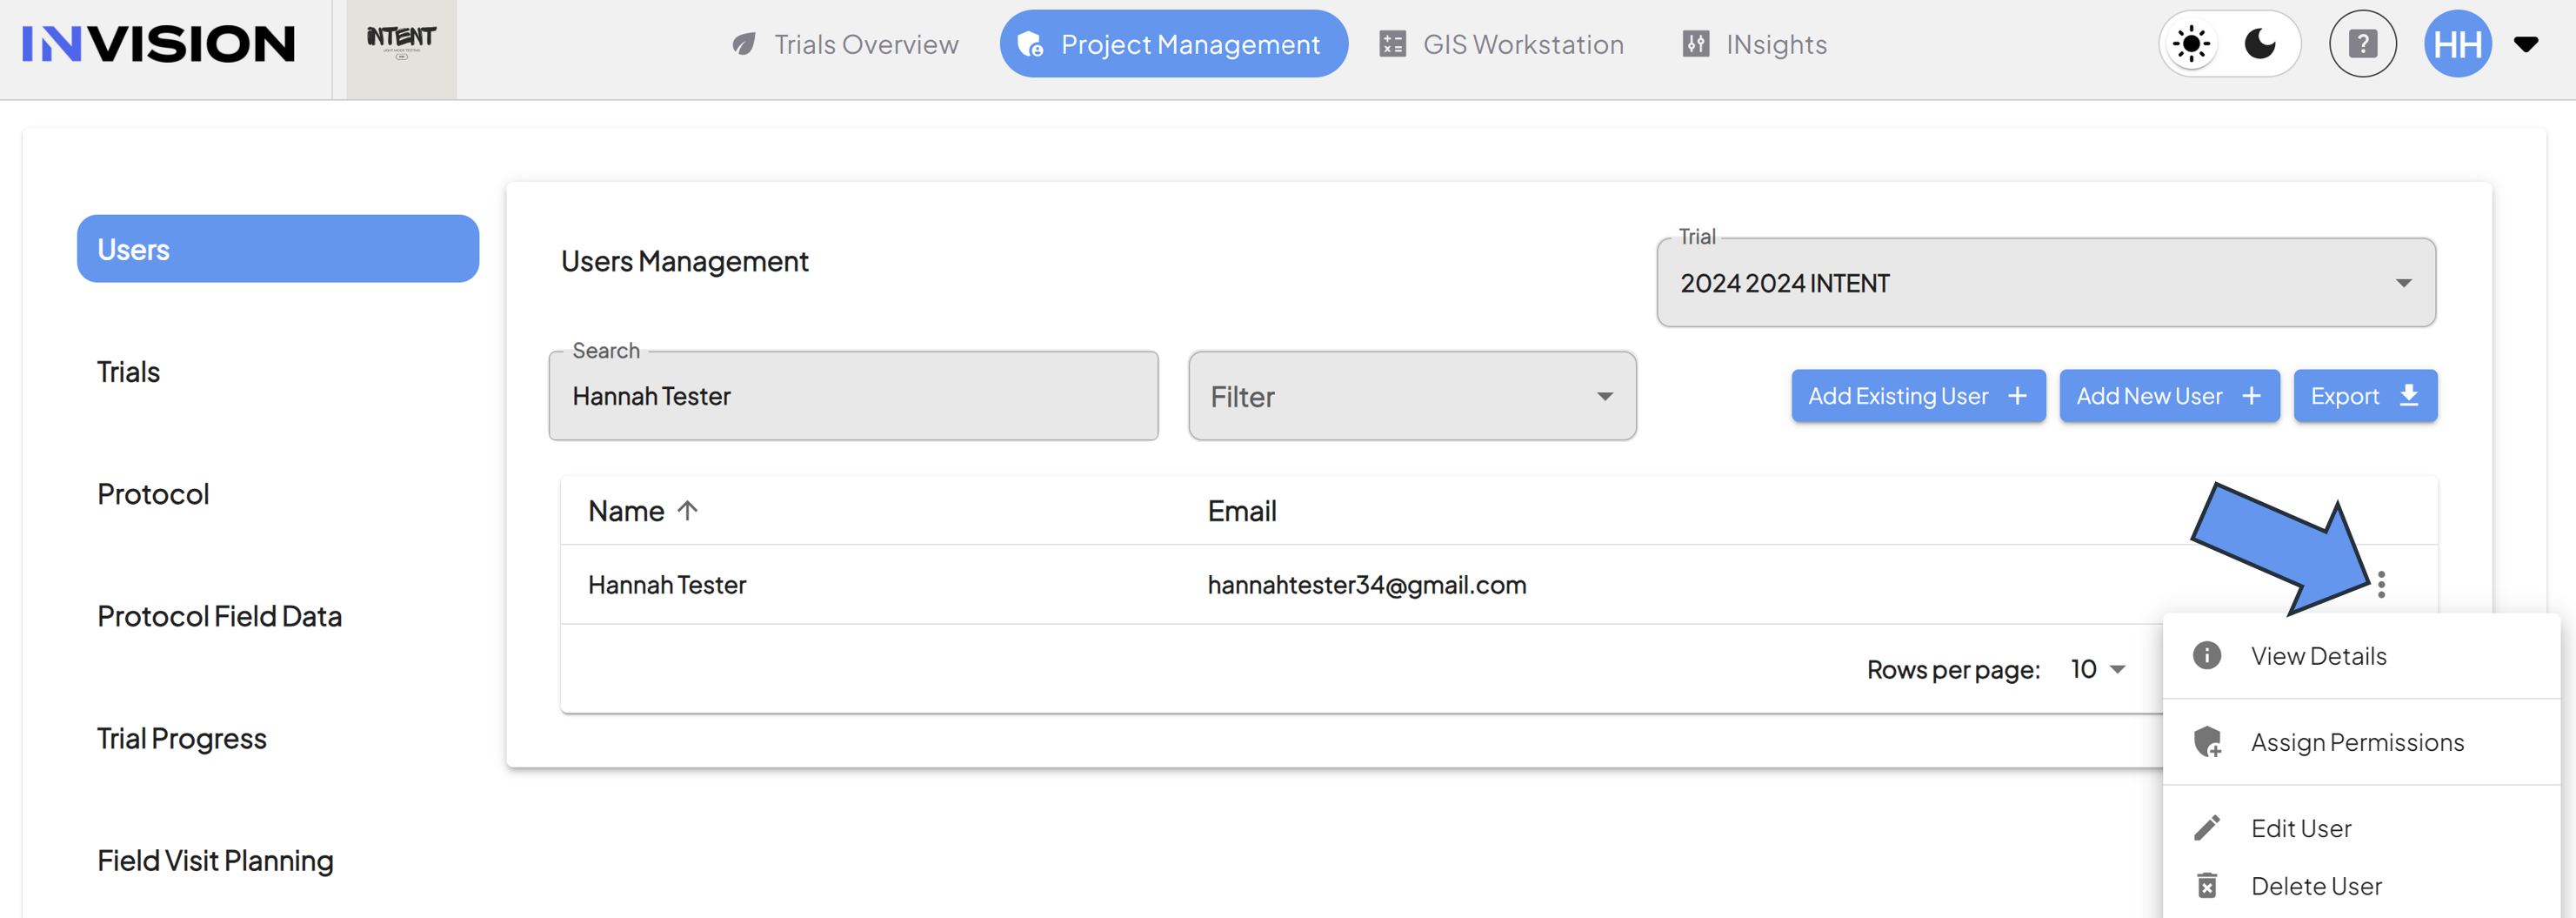
To see a list of all the available roles and how to assign them, check out our Guide to Understanding Roles in the INVISION Platform.
Trials
A Trial is an experiment conducted on an agricultural field to test one or multiple products, such as fertilizer, fungicide, insecticide, etc.
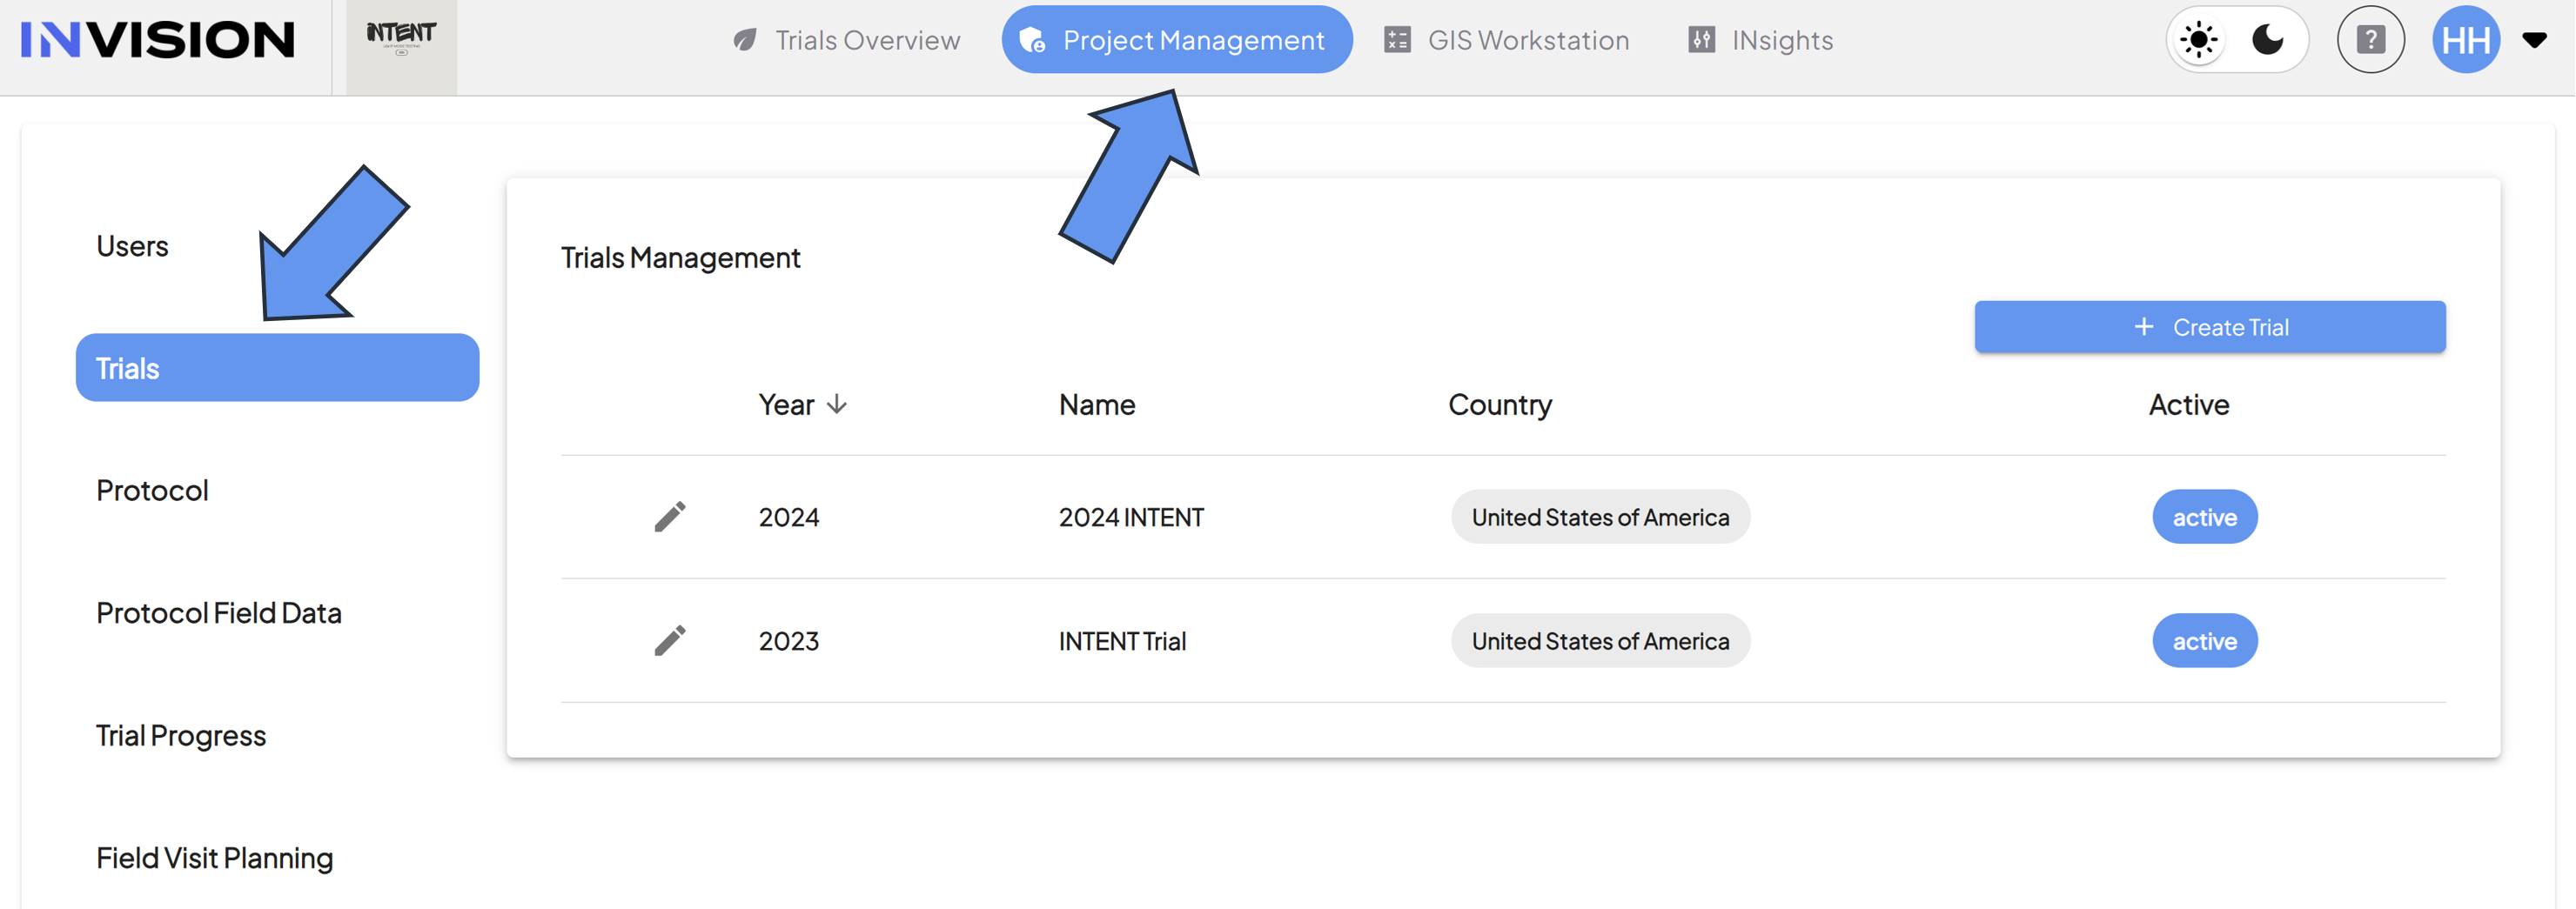
Components of the Trials Section
- Trials Management
- Function: Displays a table containing all trials created for your active client.
- Create Trial
- Function: Selecting this button will allow you to start the process of creating a trial.
- Edit Trial
- Function: Select the pencil on the far left in the table to edit that trial.
To learn more about Trial creation, check out our Guide to Creating a New Trial.
Protocol
A protocol is a series of steps that need to be carried out to complete the Trial experiment. A protocol is specific to both a single trial and a single crop, but trials can have multiple protocols. Protocols can have both mandatory and optionsoptional steps.
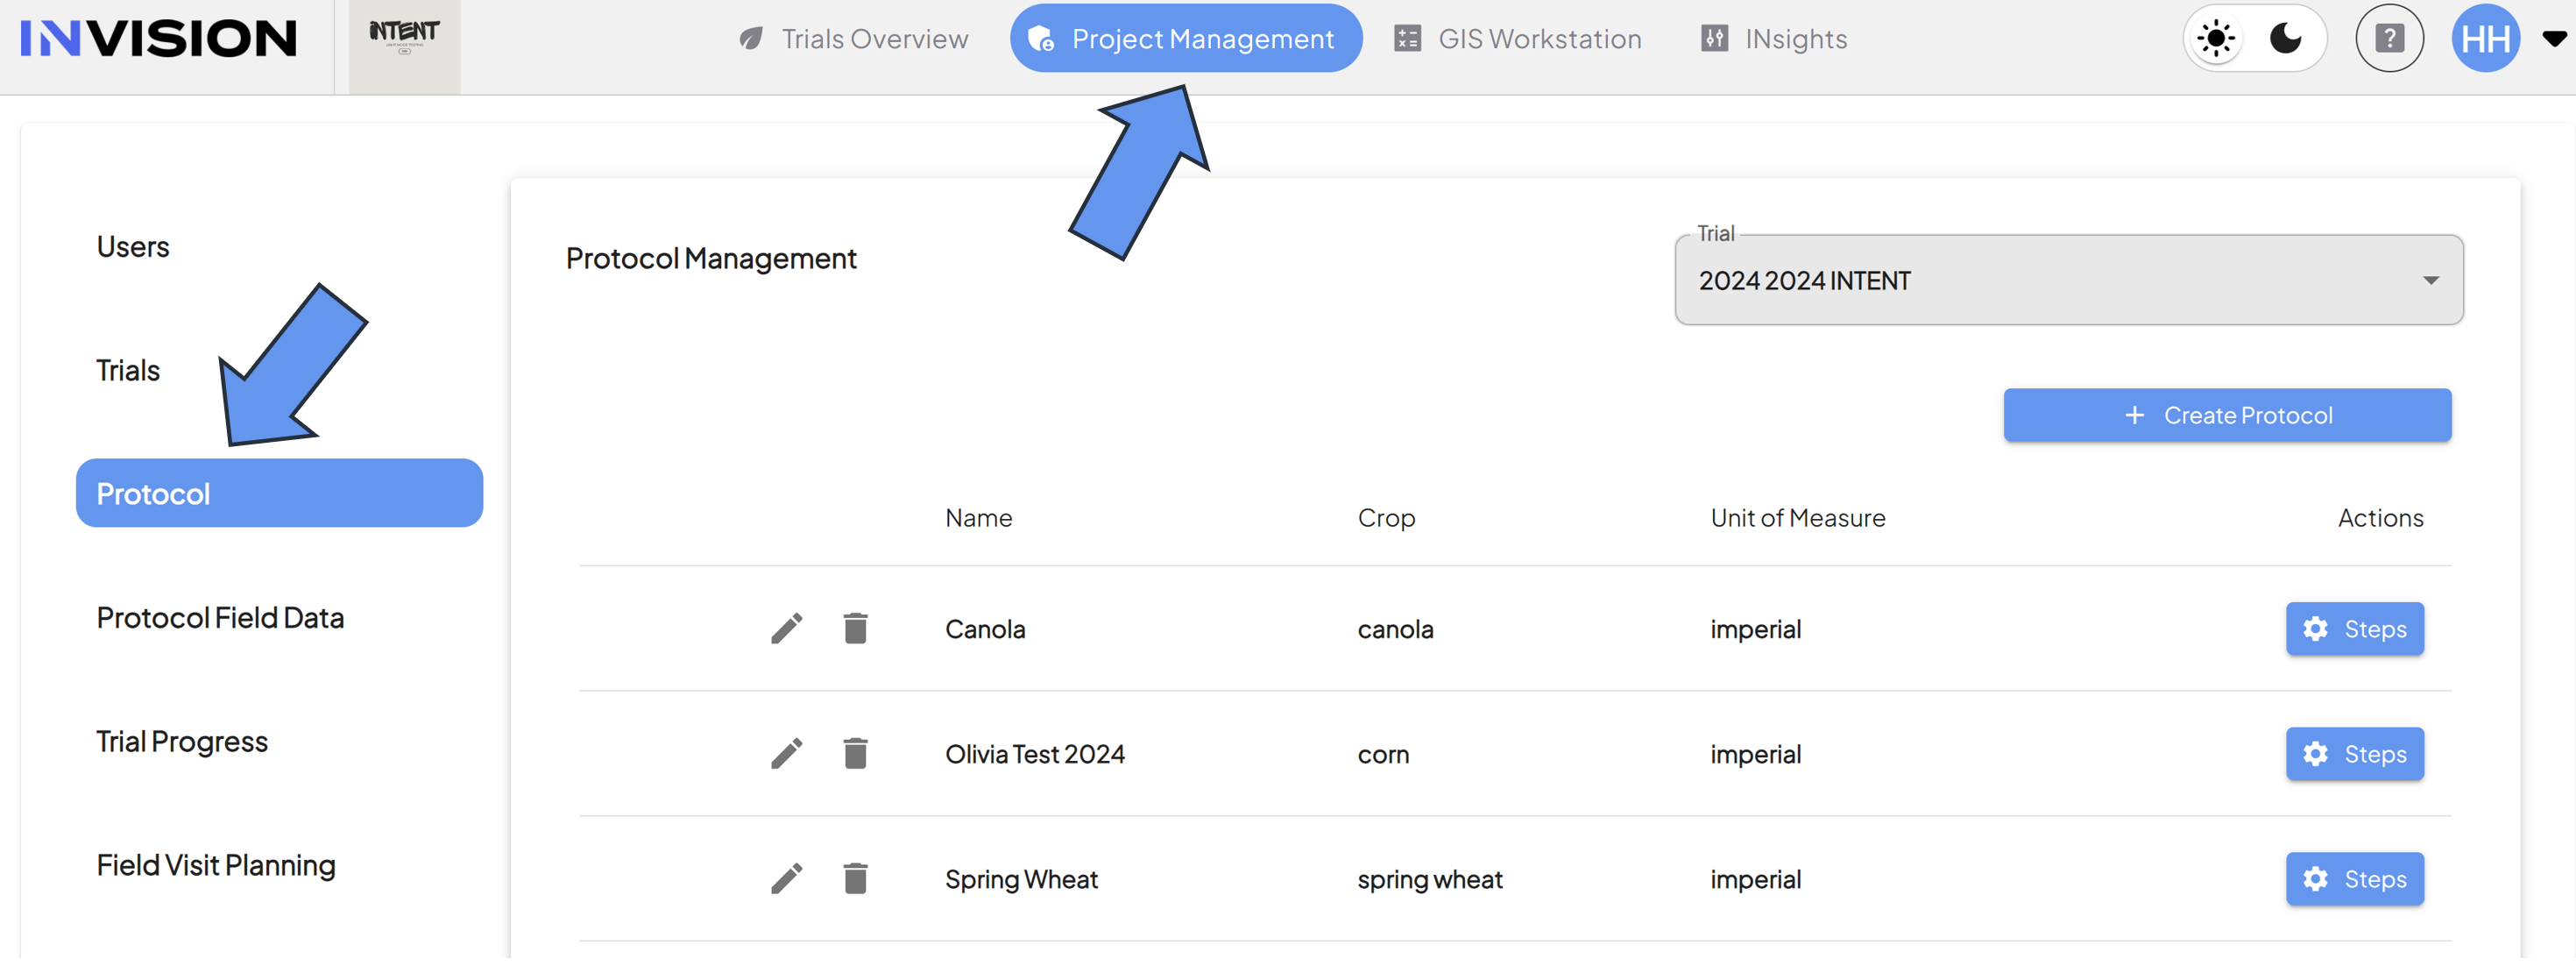
Components of the Protocol Section
- Protocol Management:
- Function: Displays a table containing all available protocols that have been created, based on the trial selection.
- Trial Selection:
- Function: Use this dropdown menu to see protocols associated with a specific trial.
- Create Protocol:
- Function: Selecting this button will allow you to start the protocol creation process.
ffProtocol Steps:- Function:
- Edit Protocol:
- Function: Select the pencil icon on the far left of the table to edit that protocol.
- Delete Protocol:
- Function: Select the trash can icon on the left side of the table to delete that protocol.
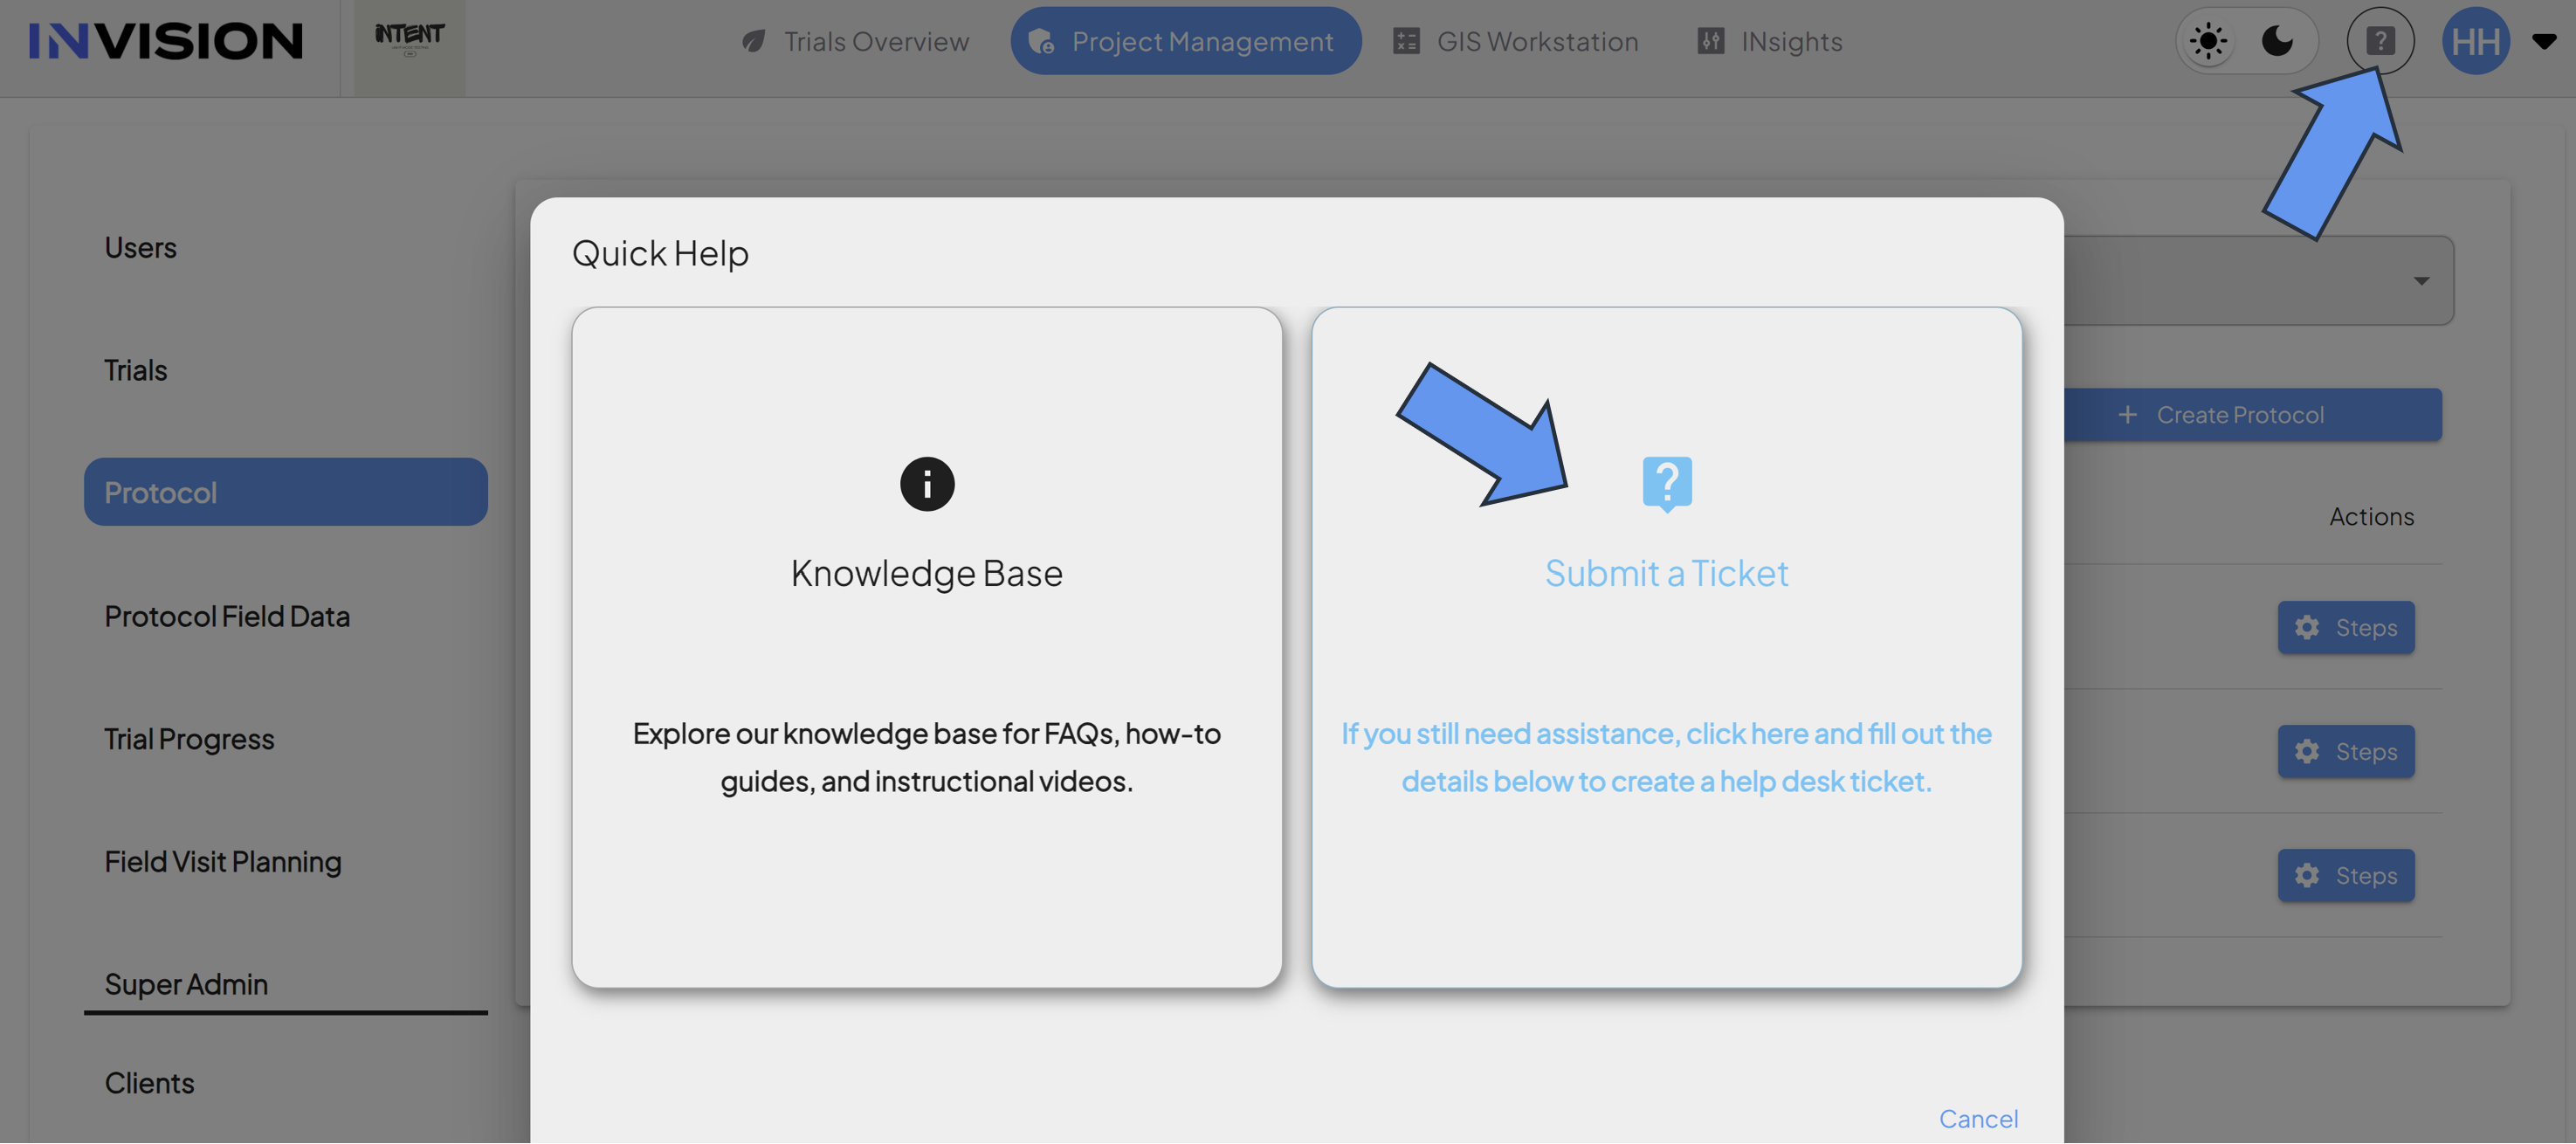
- Protocols cannot be deleted once data is associated to it. If you need assistance, submit a help desk request, or connect with your point of contact at INTENT.

- Protocols cannot be deleted once data is associated to it. If you need assistance, submit a help desk request, or connect with your point of contact at INTENT.
- Function: Select the trash can icon on the left side of the table to delete that protocol.
To learn more about Protocol creation, check out our Guide To Creating a Trial Protocol.
Protocol Field Data
Components of Protocol Field Data
- Trial Selection:
- Protocol Selection:
- Protocol Steps:
Trial Progress
Components of Trial Progress
- Trials Selection
- Optional Filters:
- Protocol:
- Grower:
- Years
- Show Dropouts
Field Visit Planning
Components of Field Visit Planning
- Trials Selection:
- Crop Selection:
- Grower Selection:
- Assignee Selection:
- Optimal Start Date:
- Optimal End Date:
- Growth Stage Selection:
- Years:
- Show Dropouts
- View Selection