How To Upload Machine Date From Your Device
Guide To Uploading Machine Data Files From Your Device
Uploading or submitting your planting, application, or harvest data to the INVISION Platform is a straightforward and easy process. You have three options available to you: uploading files from your device, connecting to a third party, or manually entering data. Continue reading this guide to discover the best way for you to upload your data to INVISION.
- Navigate to Your Field
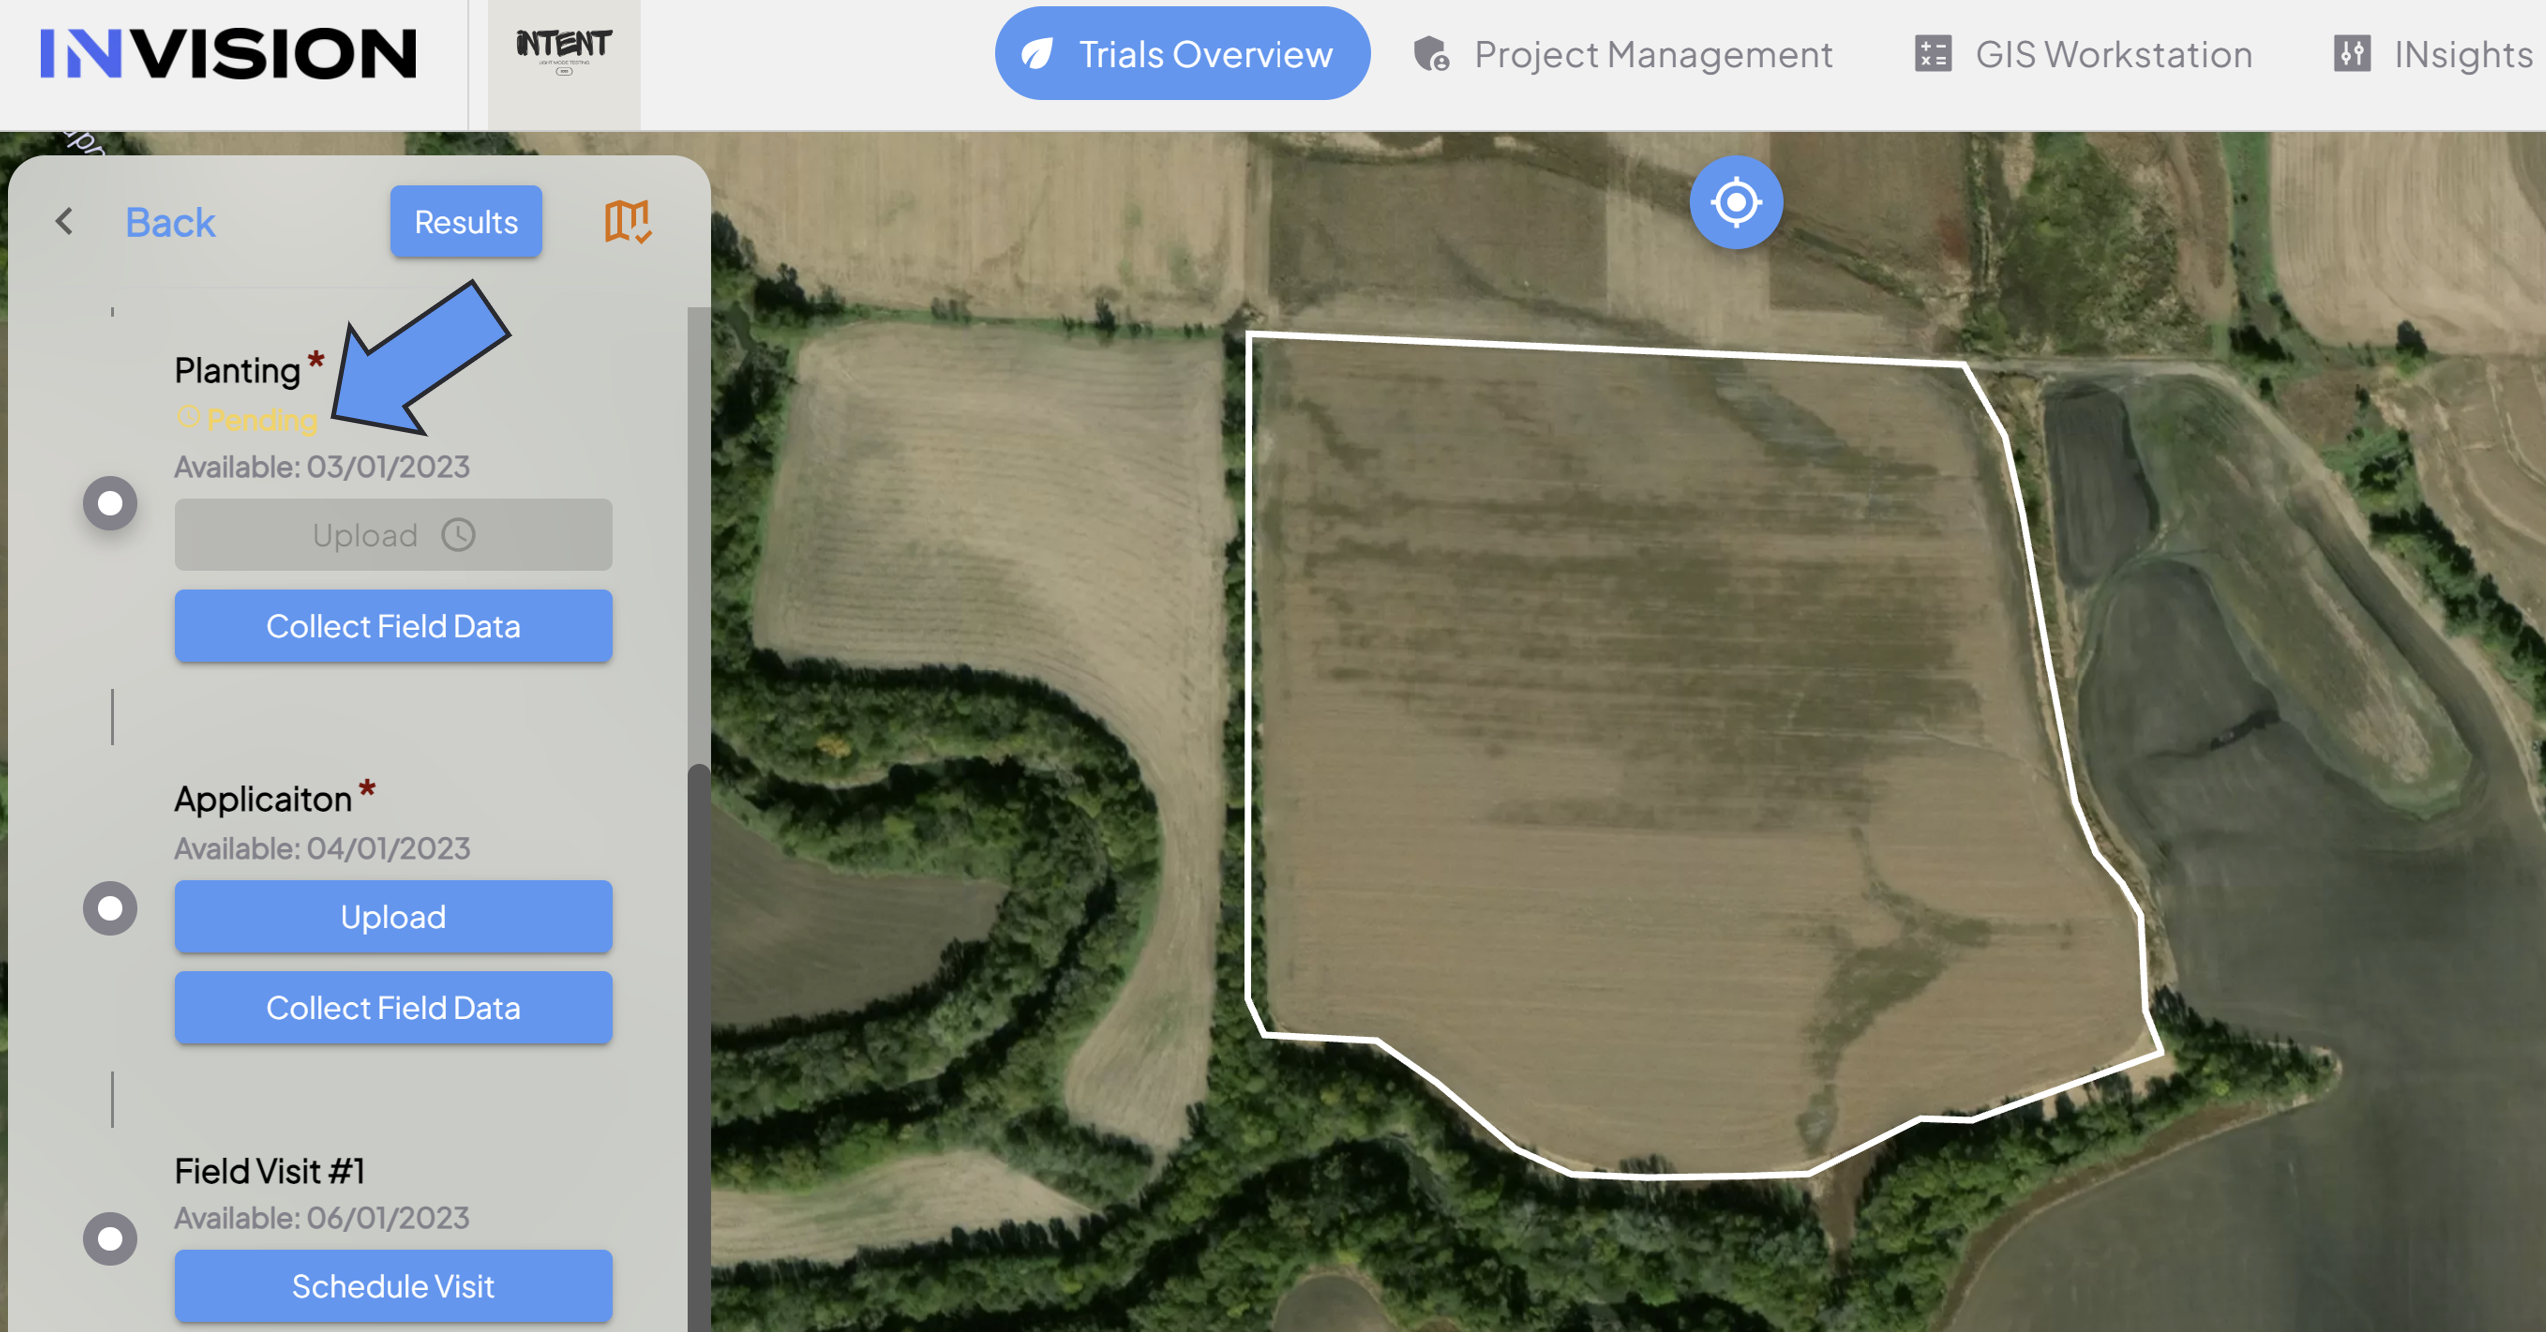
- Find the field you have machine data for on the Trials Overview Page.
- Open that field into View Fields.
- For additional help with this step, check out our Guide To Understanding the INVISION Overview Page.
- Find the Correct Protocol Step
- Locate the protocol step you need to upload data for. The three most common steps are the following:
- Planting
- Application
- Harvest
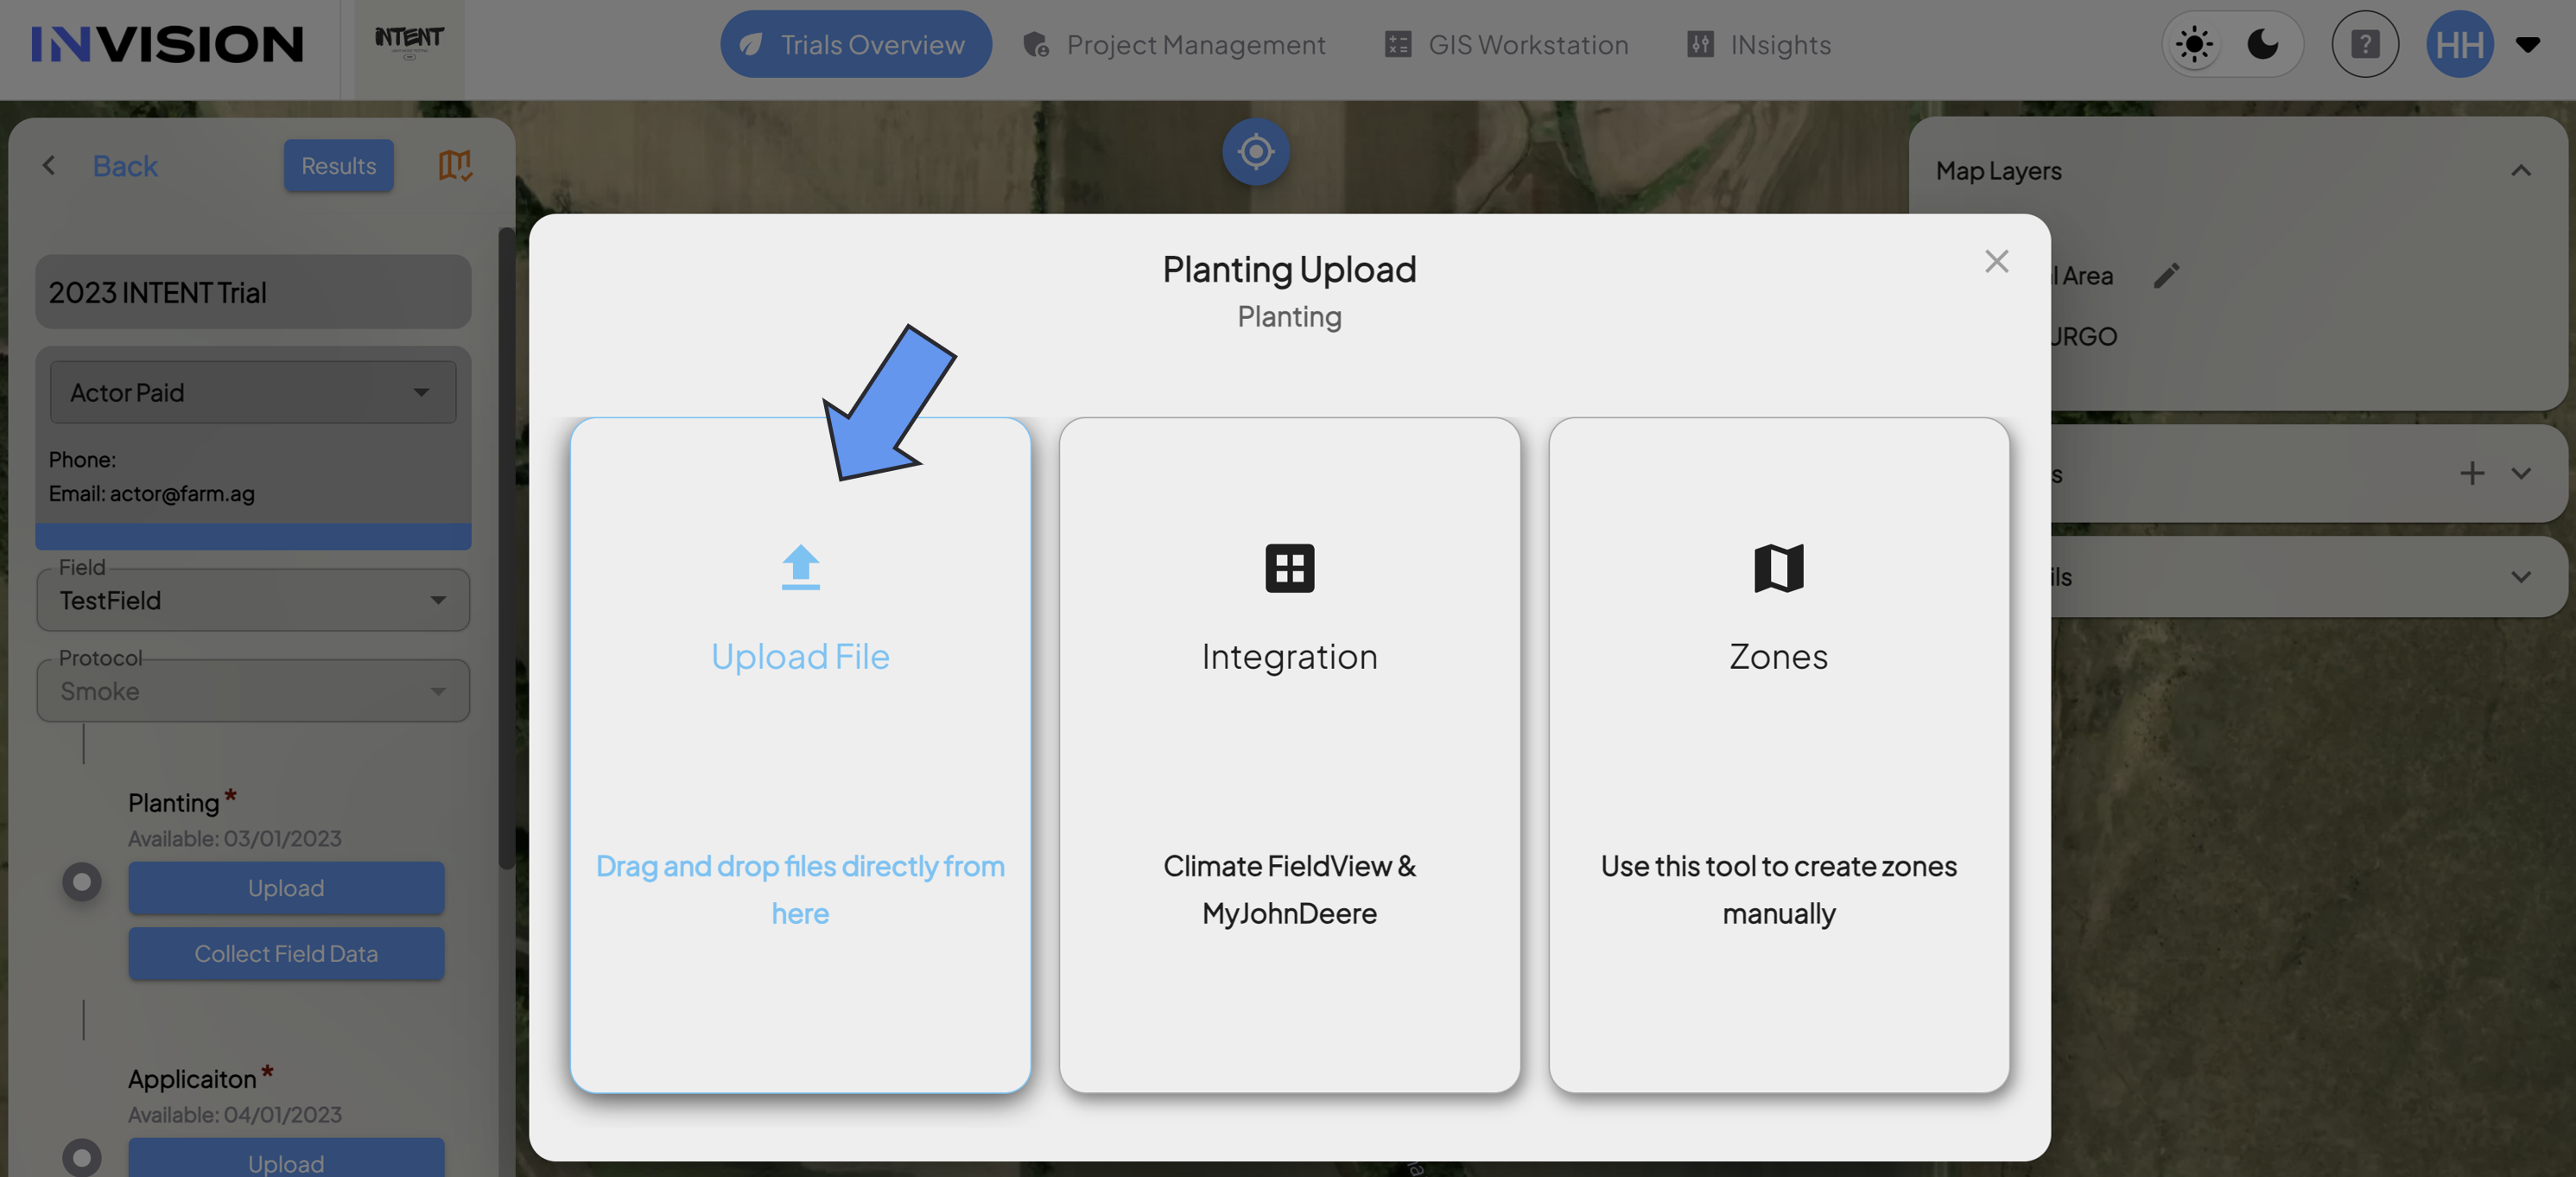
- Click on the Upload button under the step you have data for.

- This will bring up a new menu where you will have different selection options to upload data. If you have your machine files located on your computer or other device, Upload File is the option you will want to choose.
- Locate the protocol step you need to upload data for. The three most common steps are the following:

- Select Upload File
- Click on the Upload File option.

- Click on the Upload File option.
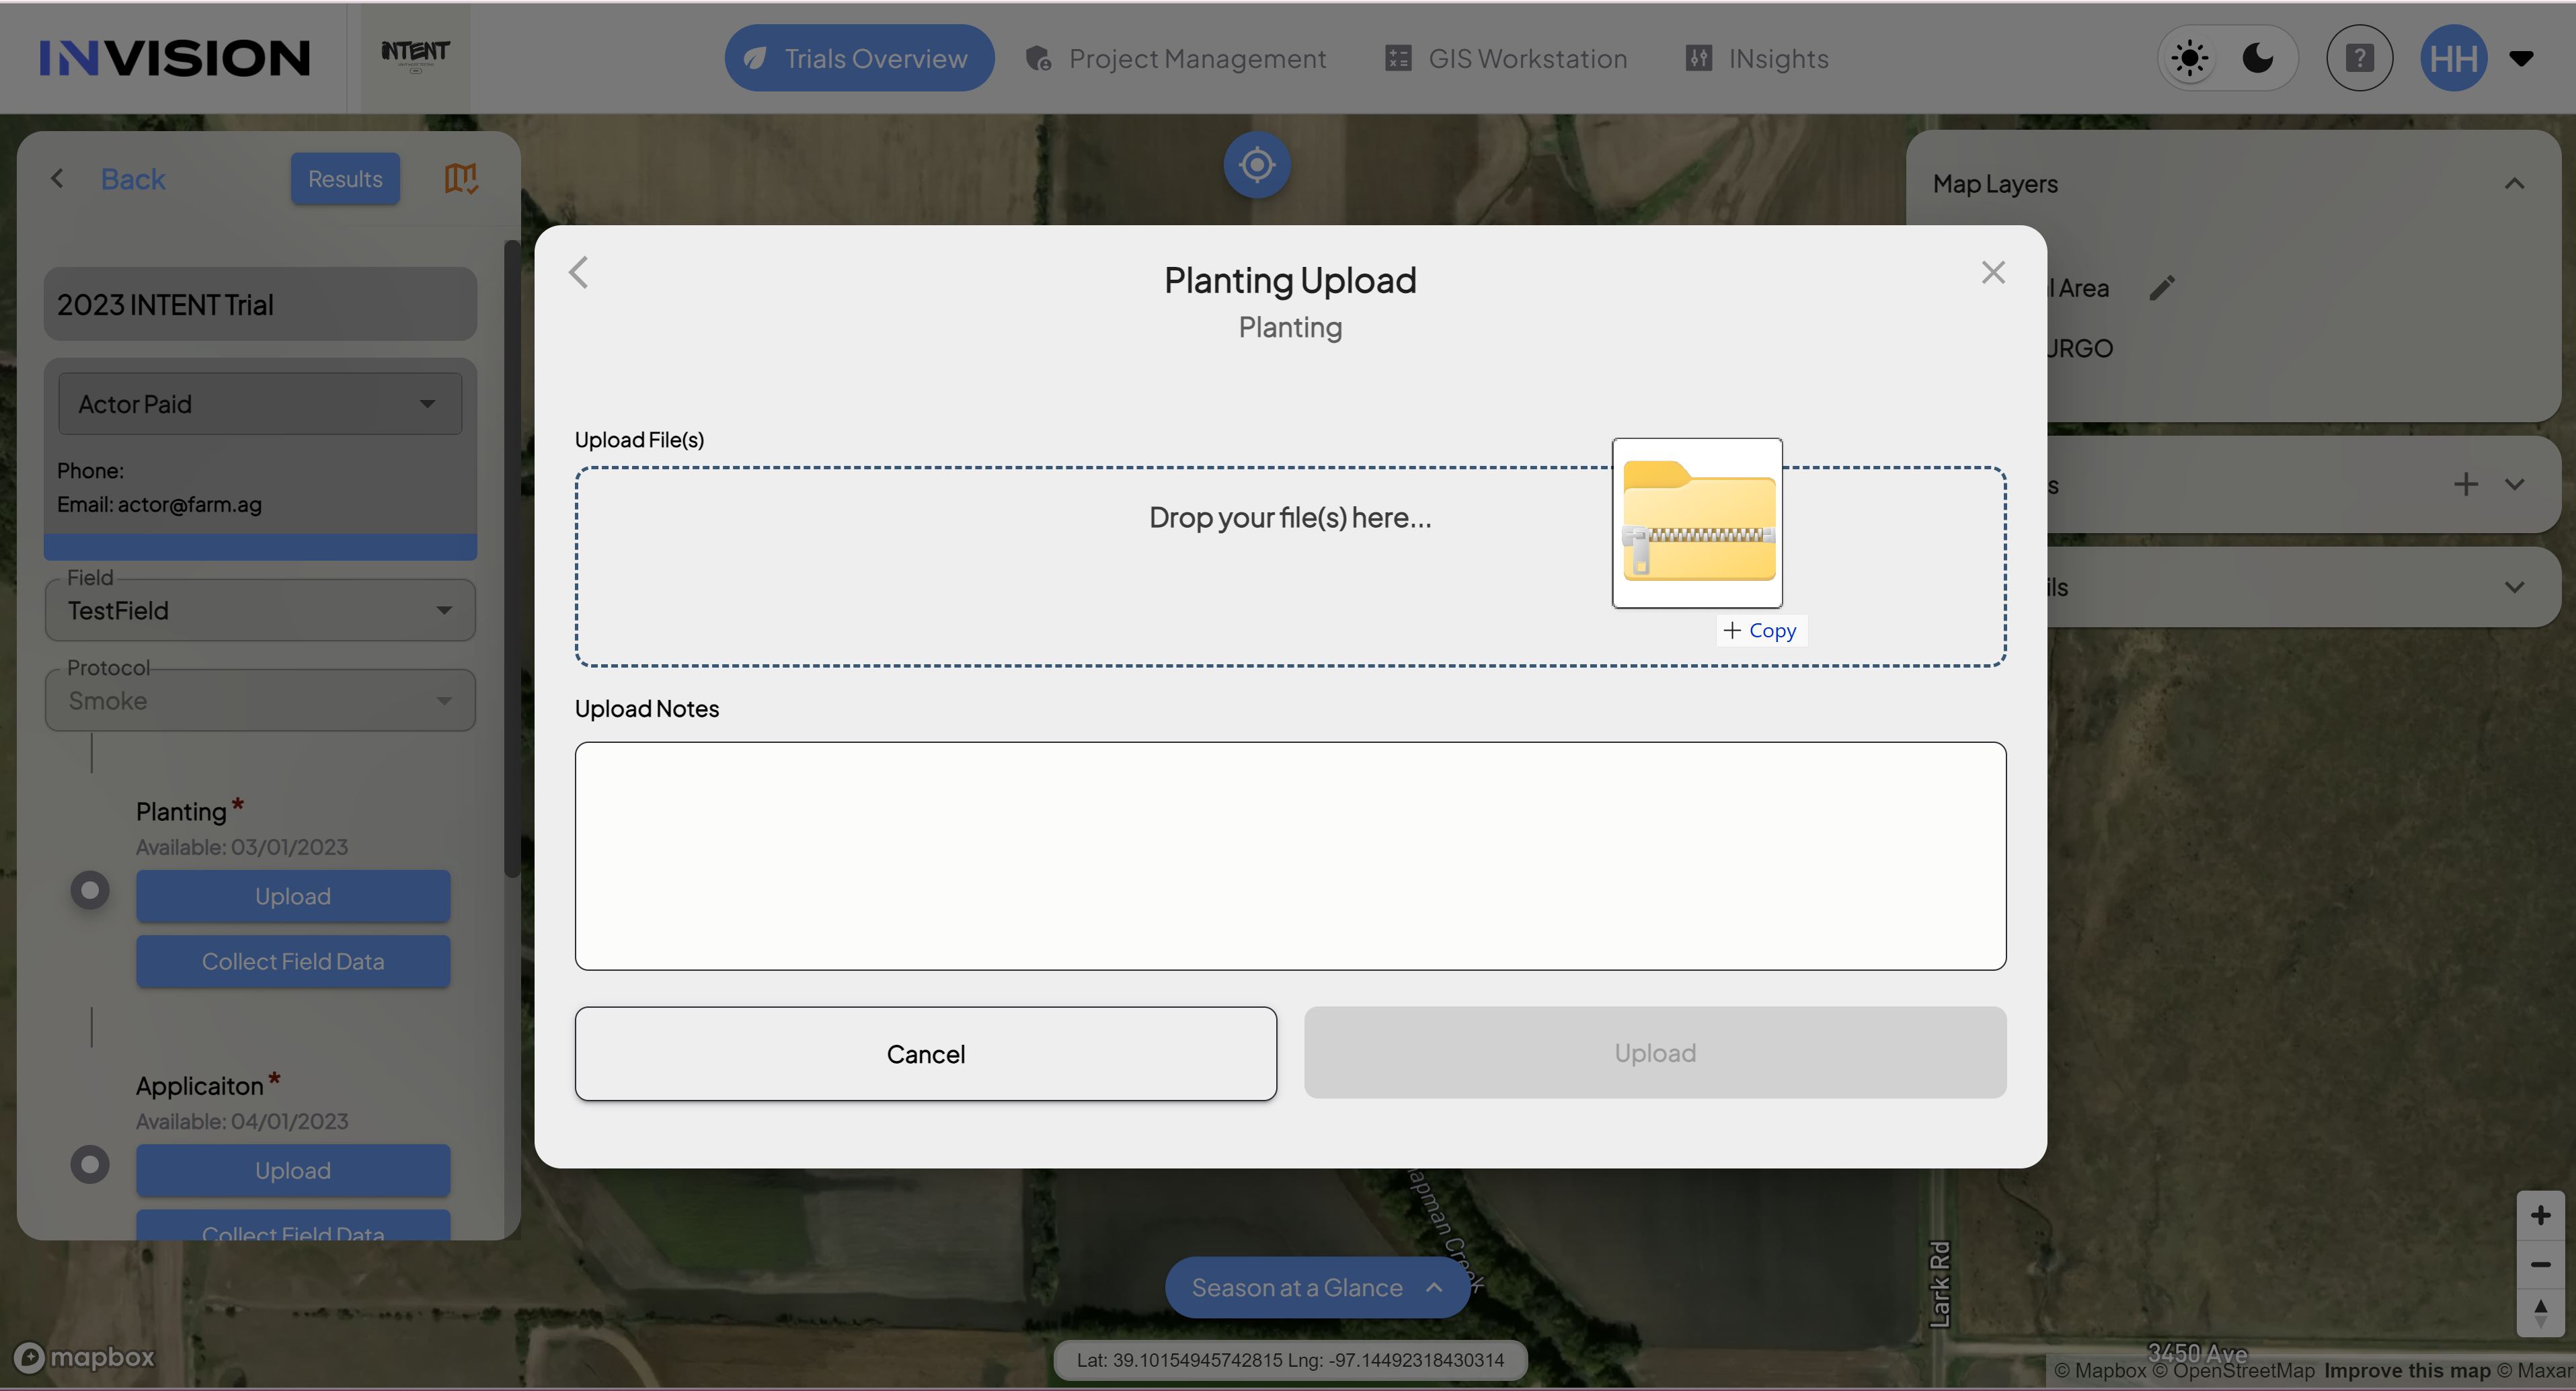
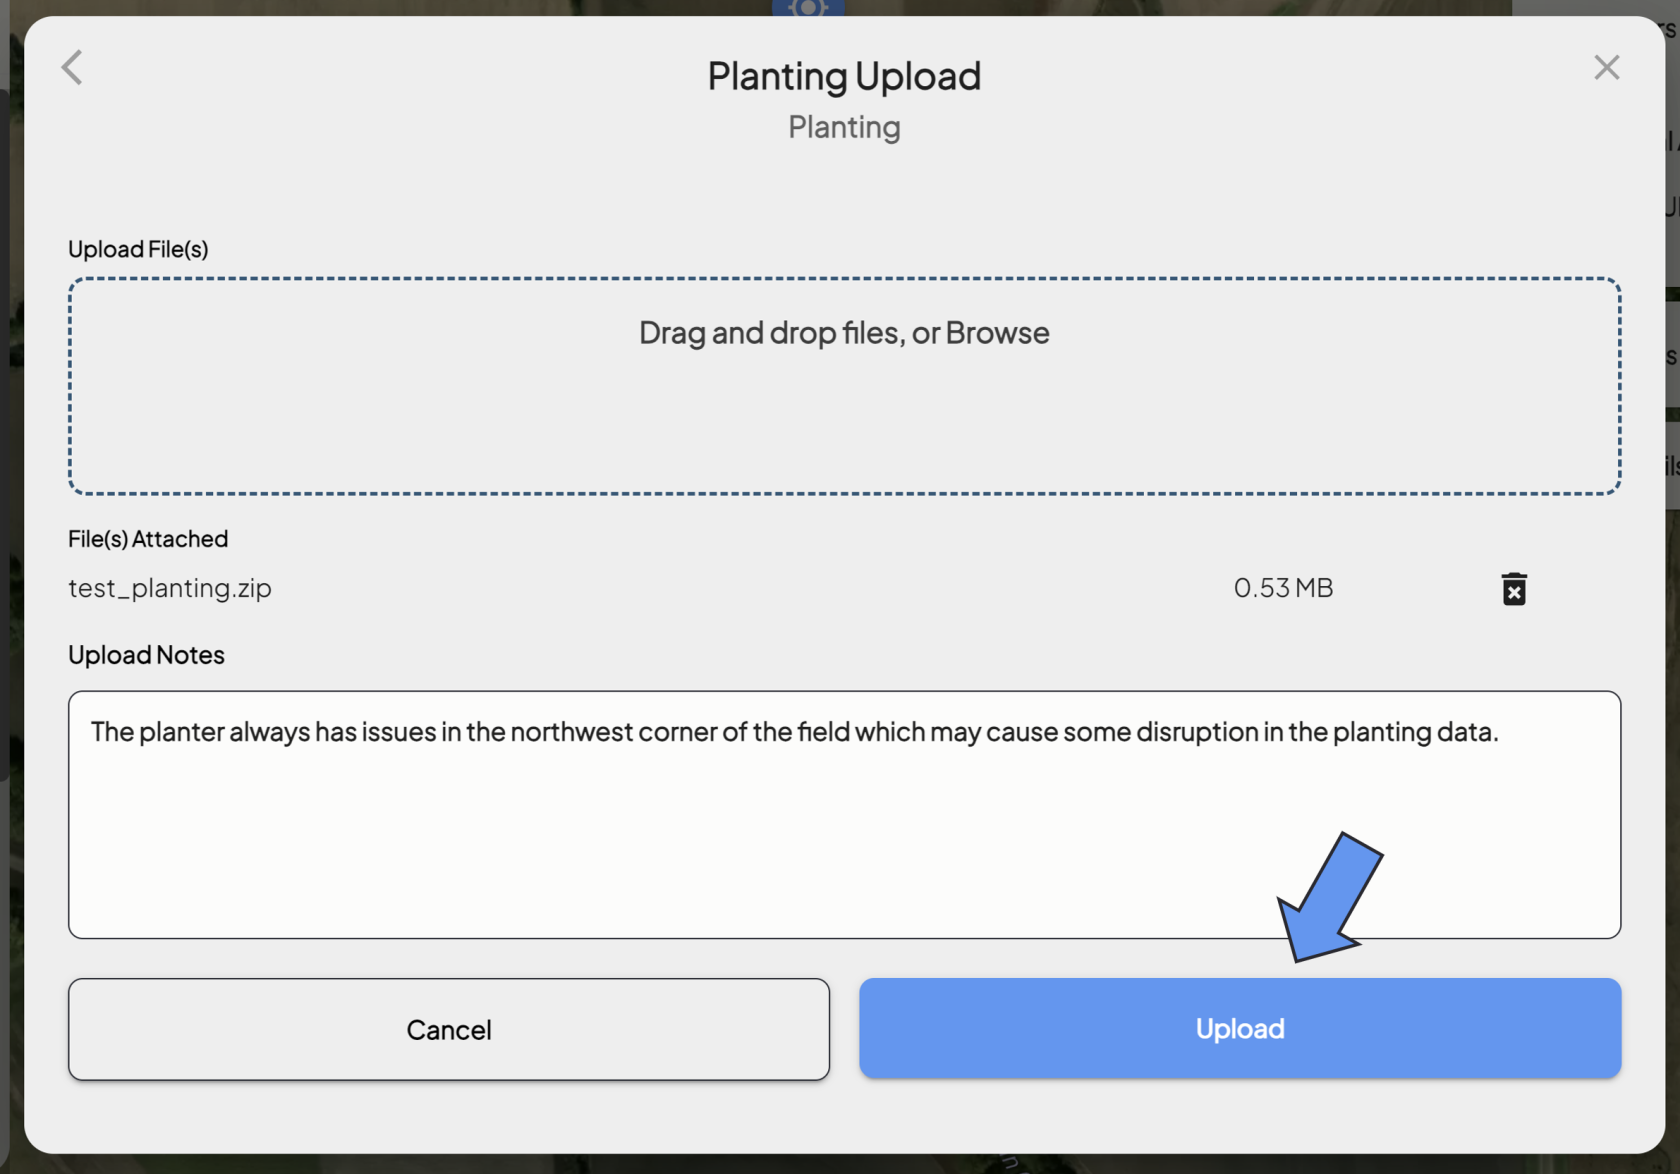
- Attach Your File
- A new popup will appear where you have two options to locate your file:
- Browse Your Files: You can click inside the dotted boundary, which will open the files available on your computer, where you can select the machine data file you're wanting to upload.
- Drag and Drop: You can also drag and drop files into the dotted boundary.

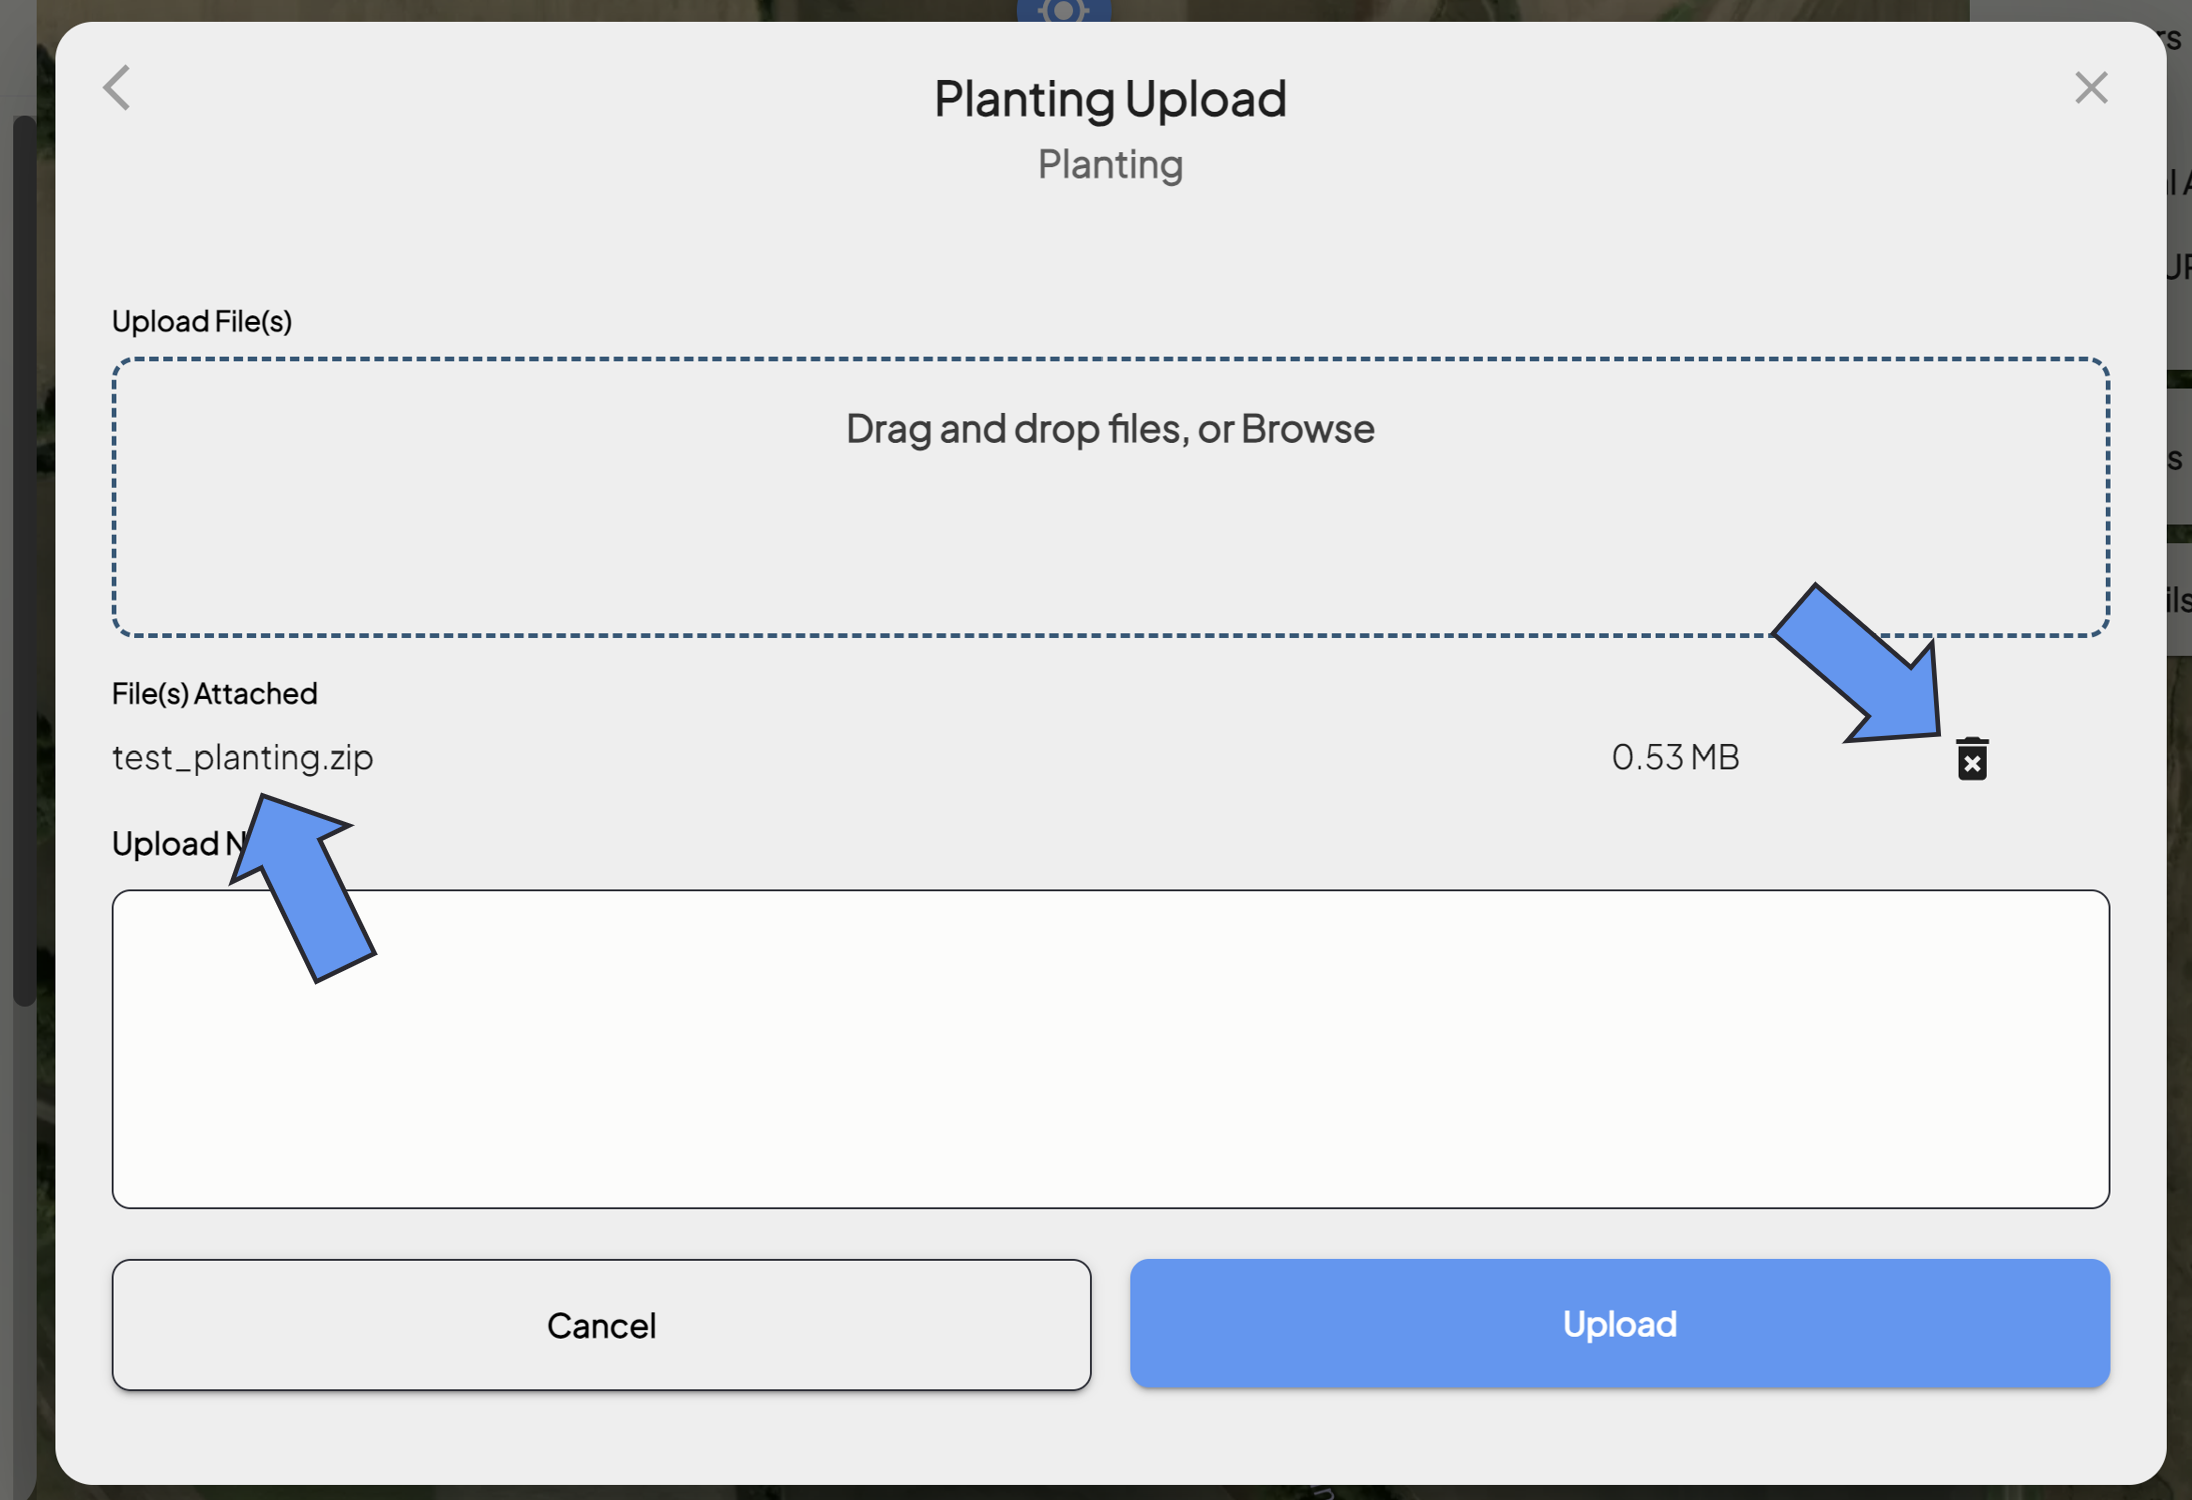
- Once your file is uploaded, you'll see the name of the file you've selected.
- Double check you've selected the correct file.
- You can remove it using the trash can icon, and select a new file if needed.

- Fill Out Upload Notes
- You have the option to fill out field notes before you upload.
- Please include any information that will be helpful to the data processor that look at this data, such as:
- Any complications with the operation
- Any landmarks that identify areas of interest
- Any weather events that could potentially have affected the operation
- Any useful information that is not obvious from the data alone
- A new popup will appear where you have two options to locate your file:
- Upload Your Data
- Once you've attached your file, checked it, and filled out the upload notes, click the Upload button to finish the upload process.
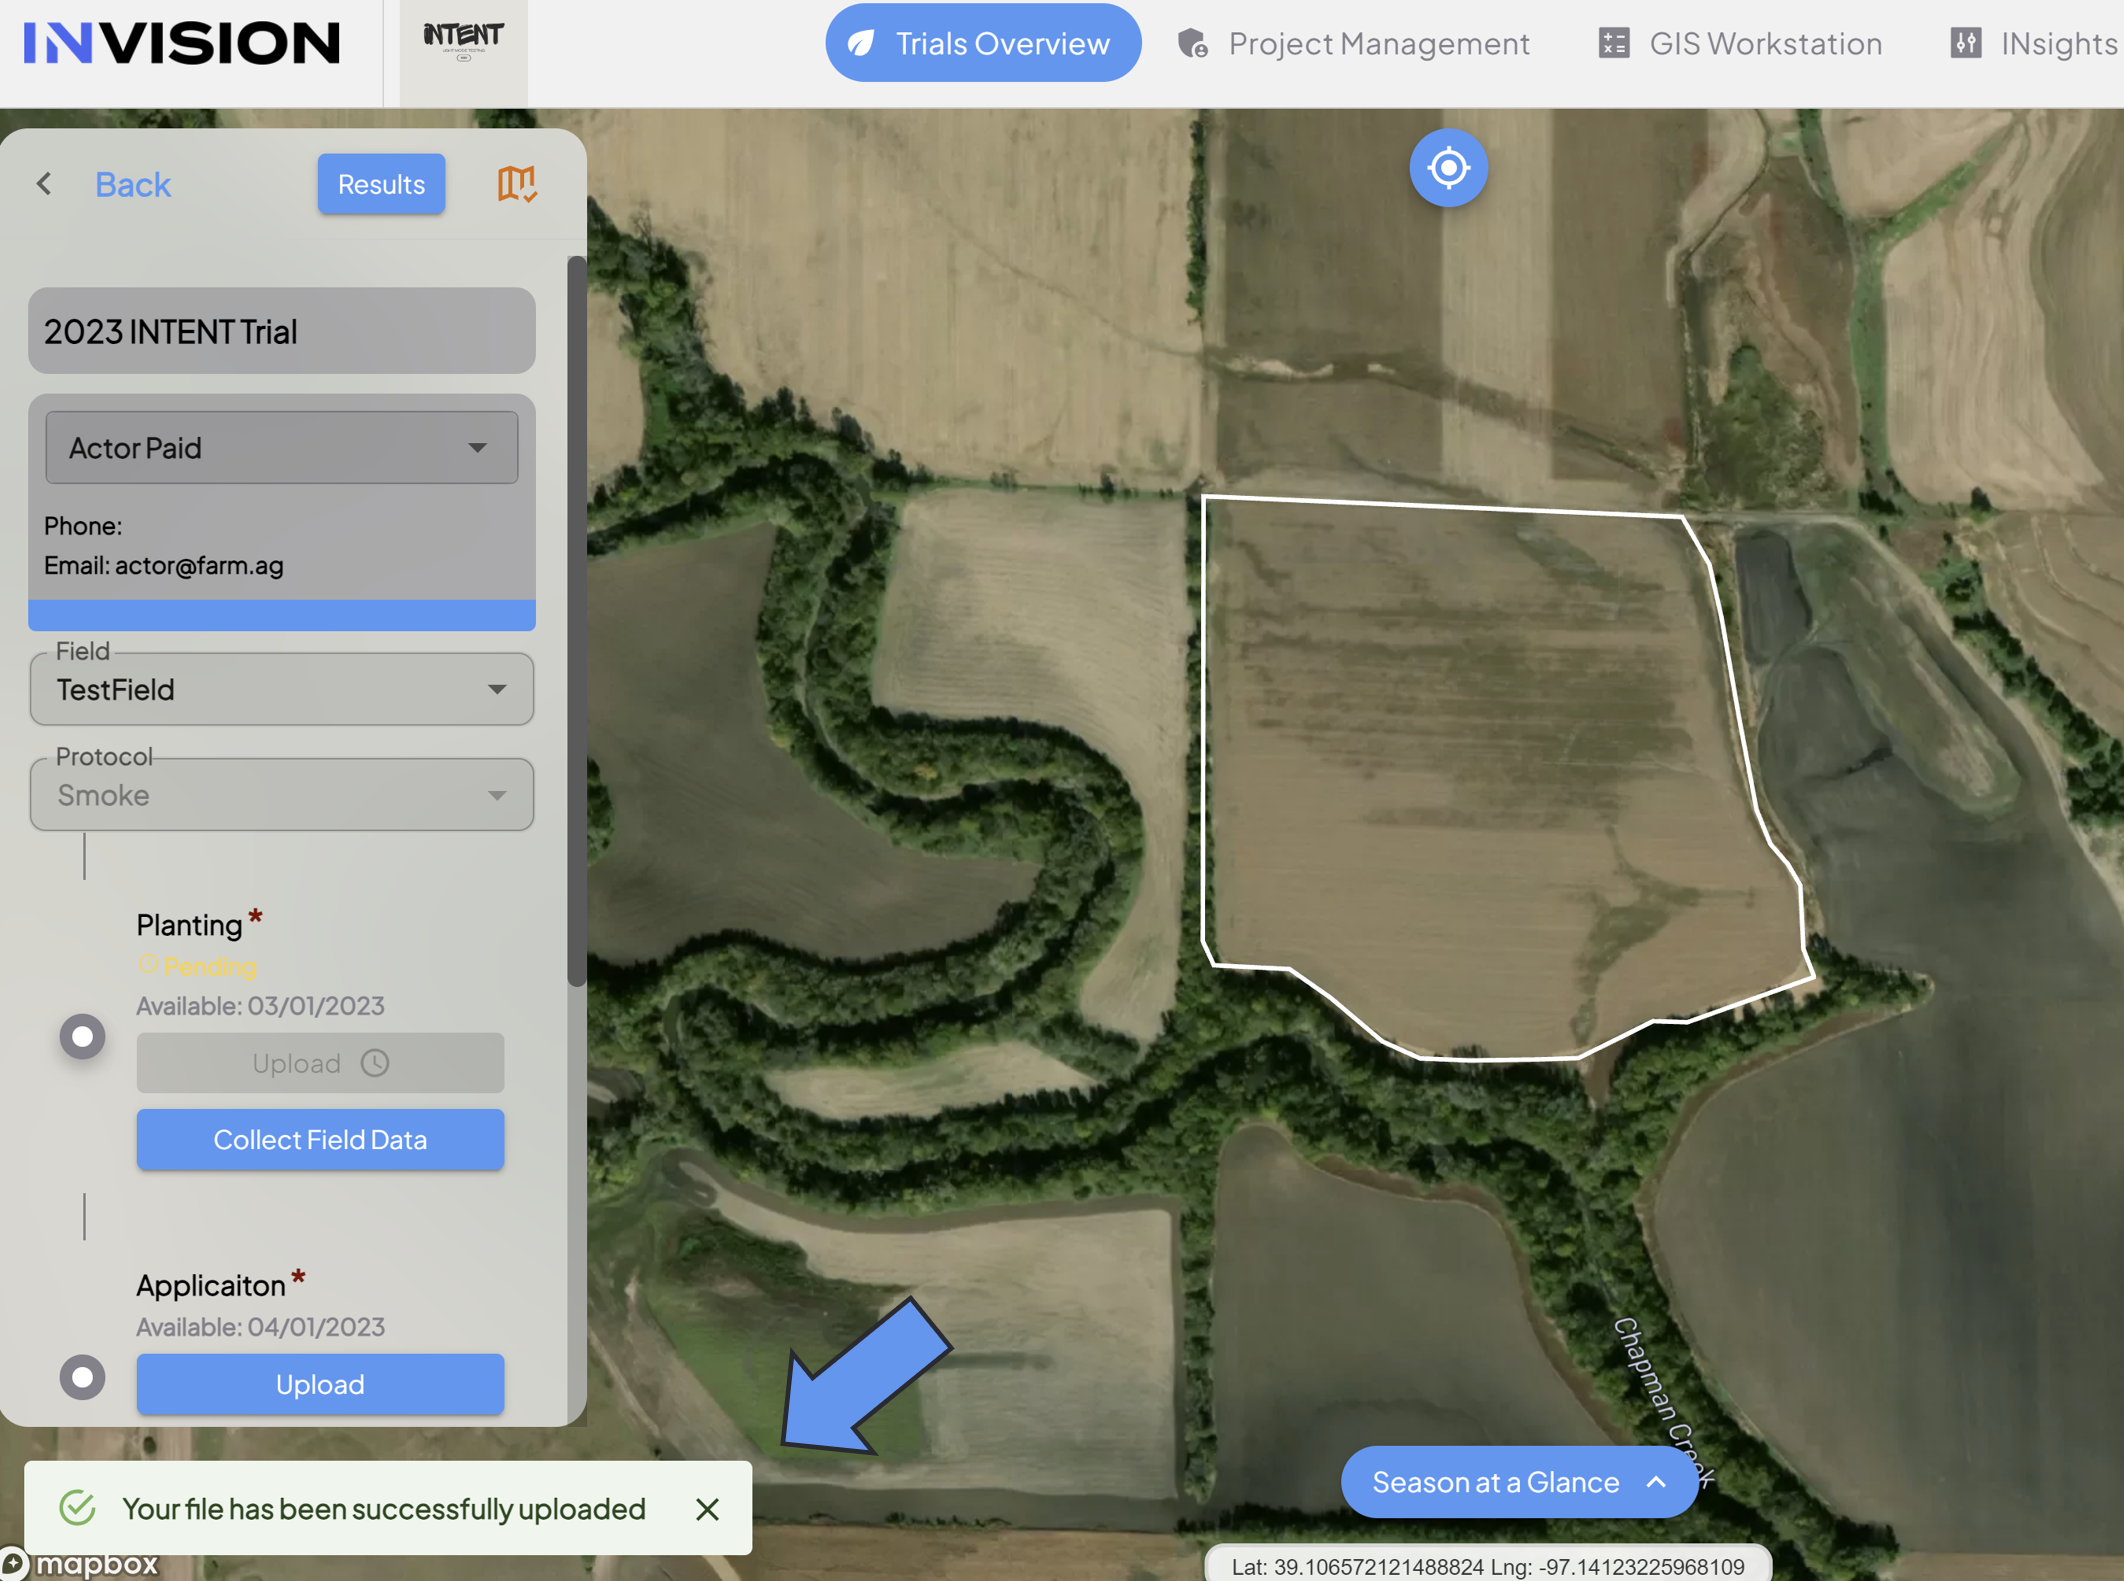
- Once the file has been uploaded, you'll see a notification in the bottom left corner of View Fields confirming the upload was successful.

- If there happens to be any issues with the file you've uploaded, you'll receive an email with an update of what the issue was, and next steps to follow.
- Once you've attached your file, checked it, and filled out the upload notes, click the Upload button to finish the upload process.
- Check Your File Status
- You can see the status of your file underneath the step name. The following statuses are possible:
- Available: This status means you still need to upload a file for this protocol step.
- If you've uploaded your file once, but come back to this step and see the status as available, that means there was an issue with your file. Please address the issue and upload again.
- Pending: This status means your file is still being processed. Keep an eye on your email inbox in case there are any issues.
- Completed: This status means you've successfully uploaded your machine data file.

- Available: This status means you still need to upload a file for this protocol step.
- You can see the status of your file underneath the step name. The following statuses are possible: