# How to Enter Manual Data
#### **Guide to Uploading Machine Data**
Uploading or submitting your planting, application, or harvest data to the INVISION Platform is a straightforward and easy process. You have three options available to you: uploading files from your device, connecting to a third party, or manually entering data. Continue reading this guide to discover the best way for you to upload your data to INVISION.
1. **Navigate to Your Field**
- Find the field you have machine data for on the Trials Overview Page.
- Open that field into View Fields.
- For additional help with this step, check out our [Guide To Understanding the INVISION Overview Page](https://docs.prod.intent.ag/books/invision-learning-guide/page/understanding-the-invision-overview-page).
2. **Find the Correct Protocol Step**
- Locate the protocol step you need to upload data for. The three most common steps are the following:
- Planting
- Application
- Harvest
- Click on the **Upload** button under the step you have data for.
[](https://docs.prod.intent.ag/uploads/images/gallery/2024-03/uC1image.png)
- This will bring up a new menu where you will have different selection options to upload data. If you have no machine data files and need to manually upload data, **Zones/Manual Harvest** is the option for you. How you manually upload depends on the type of data you need to submit.
##### **Planting/Application**
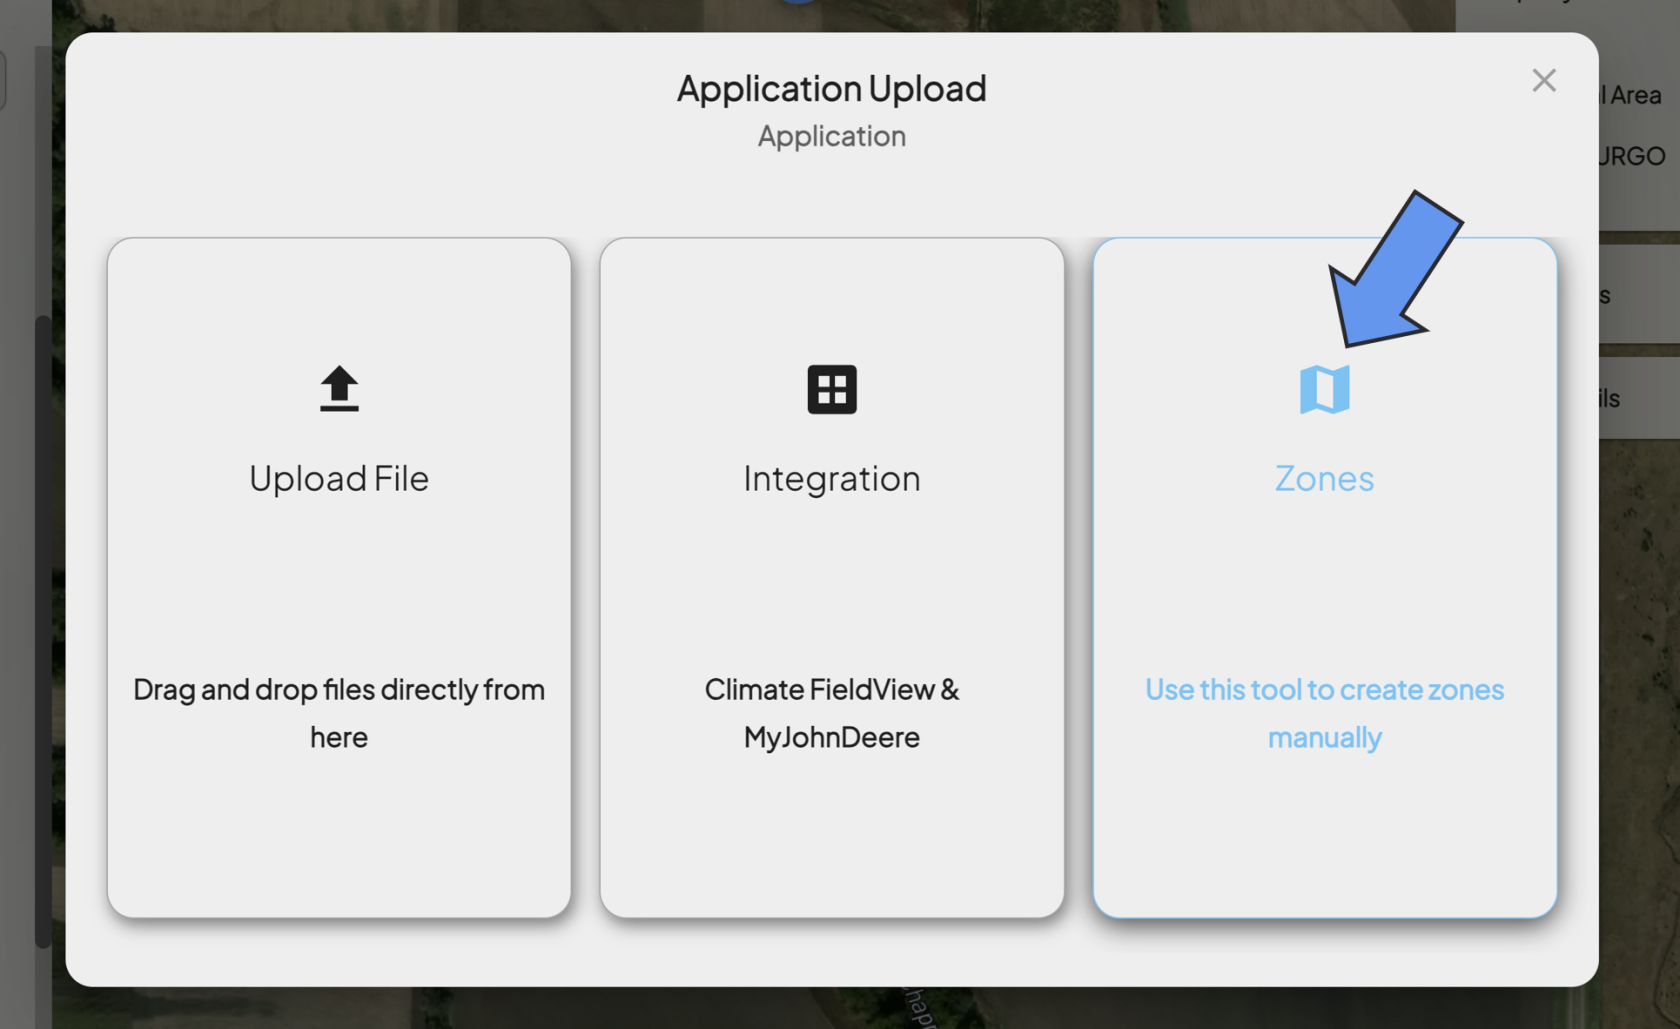
1. **Select Zones**
- If you need to submit planting or application information manually, you'll need to draw in zones. Click on the **Zones** option.
[](https://docs.prod.intent.ag/uploads/images/gallery/2024-03/screenshot-2024-03-26-144945.png)
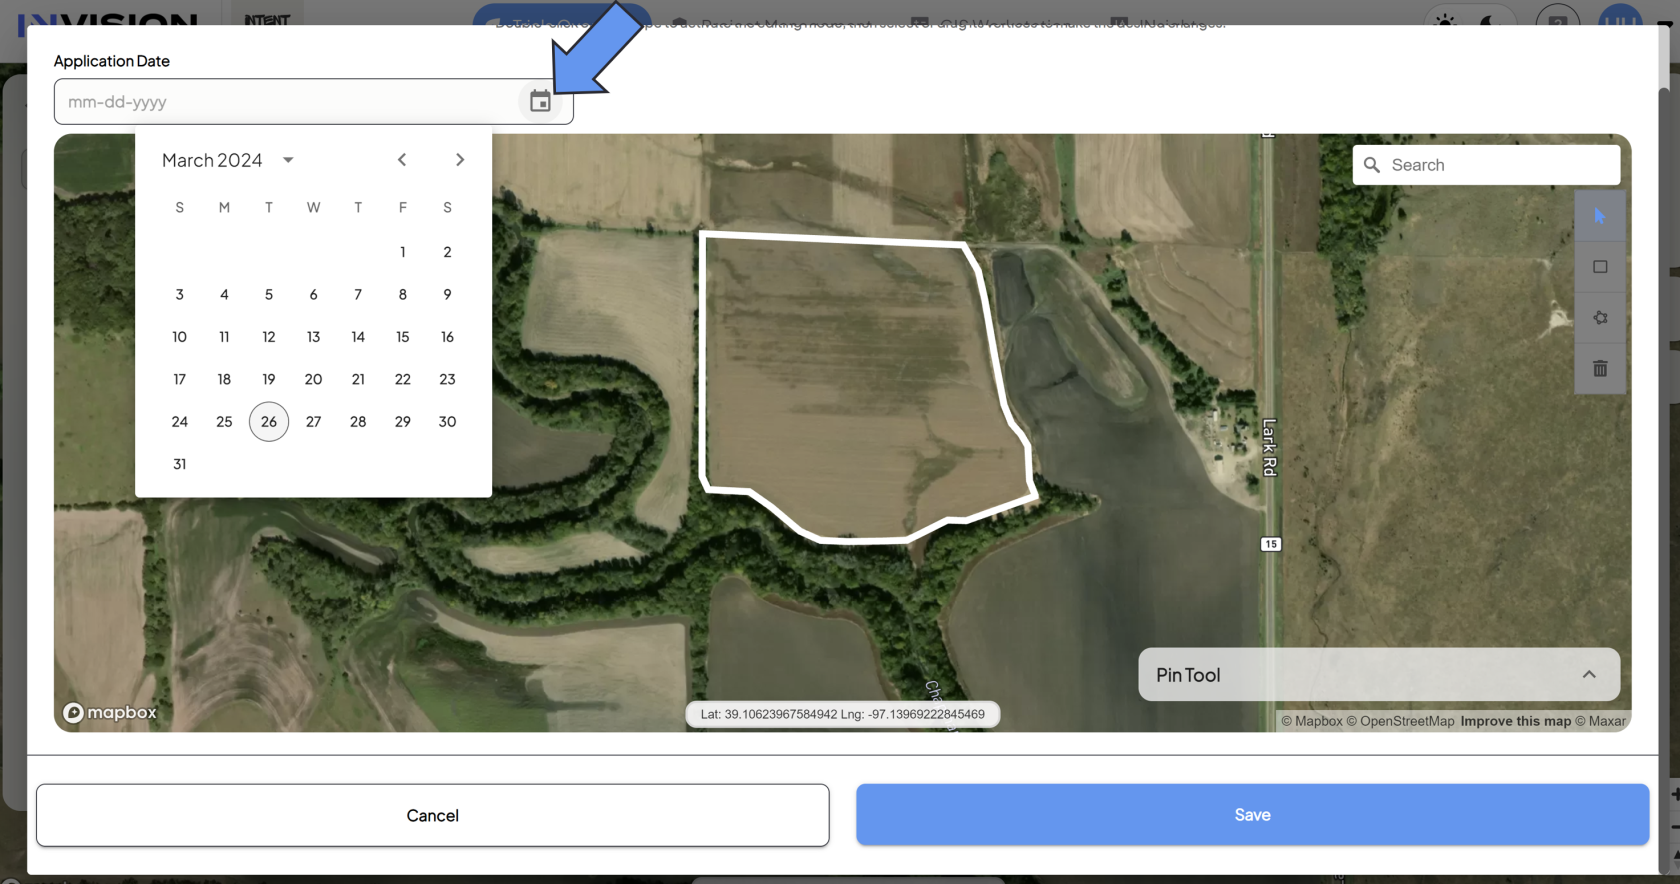
2. **Fill Out Operation Date**
- Select the date the operation took place.
[](https://docs.prod.intent.ag/uploads/images/gallery/2024-03/screenshot-2024-03-26-145452.png)
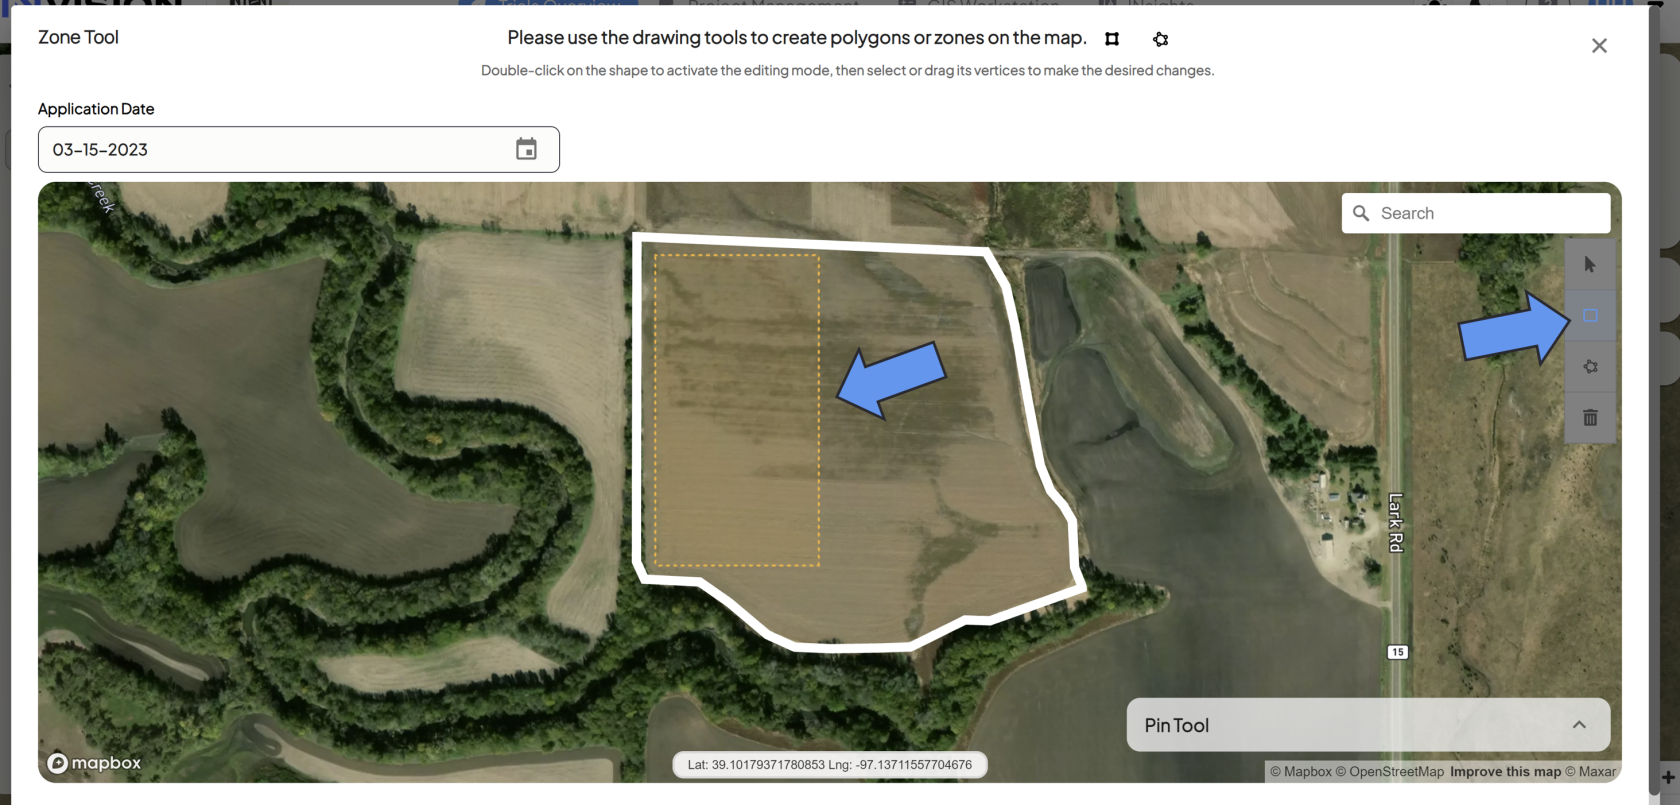
3. **Draw A Zone**
- You will need to draw a zone for each product in your protocol. You have a variety of polygon tools to work with:
- The *rectangular polygon tool* will create a rectangular polygon shape as your drag your mouse.
[](https://docs.prod.intent.ag/uploads/images/gallery/2024-03/screenshot-2024-03-26-150422.png)
- The *star shaped polygon* *tool* will allow you to drop connected points to create a polygon.
[](https://docs.prod.intent.ag/uploads/images/gallery/2024-03/screenshot-2024-03-26-151854.png)
- The *Pin Tool* will allow you to drop pins at specific latitude + longitude measurements to assist you in zone creation.
[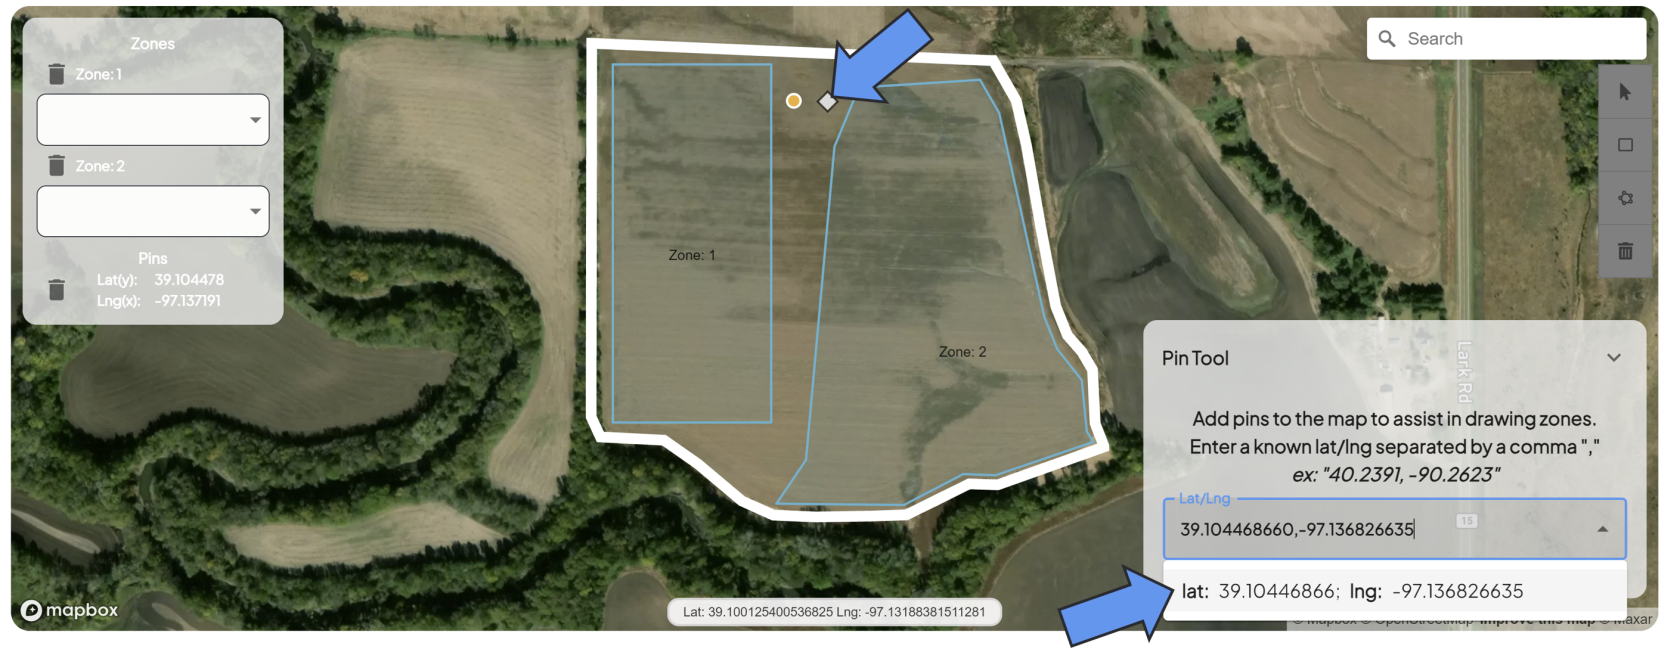](https://docs.prod.intent.ag/uploads/images/gallery/2024-03/screenshot-2024-03-26-152922.png)
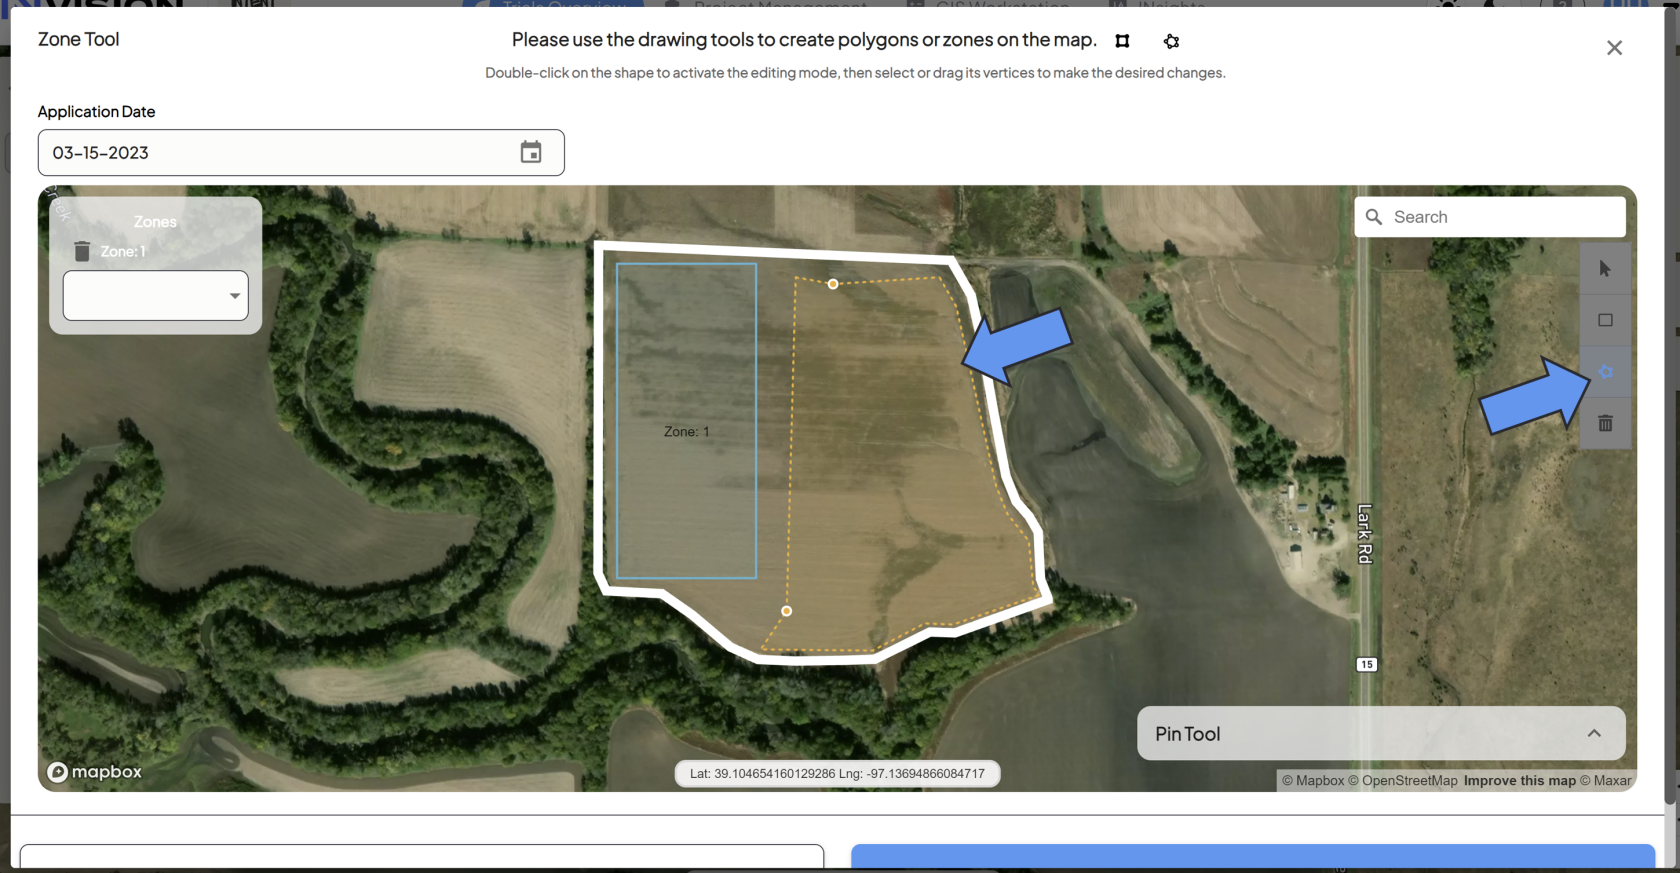
4. **Make Edits to Your Zones**
- You can double click on zones you've created to edit them.
- You can select any of the vertices, which will allow you to drag them around to create the shape you need.
- Use the trash can icon to delete any zones or pins you're unhappy with.
5. **Grower Standard Practice**
- You might need to draw in a zone for any untreated areas of the field, sometimes referred to as the *Grower Standard Practice (GSP)* area.
- Whether you need to or not will depend on if the *Untreated* functionality is disabled or not. Reach out to your point of contact with INTENT if you're unsure.
6. **Select Your Products**
- For each zone you draw, you need to select which Product is associated with it.
[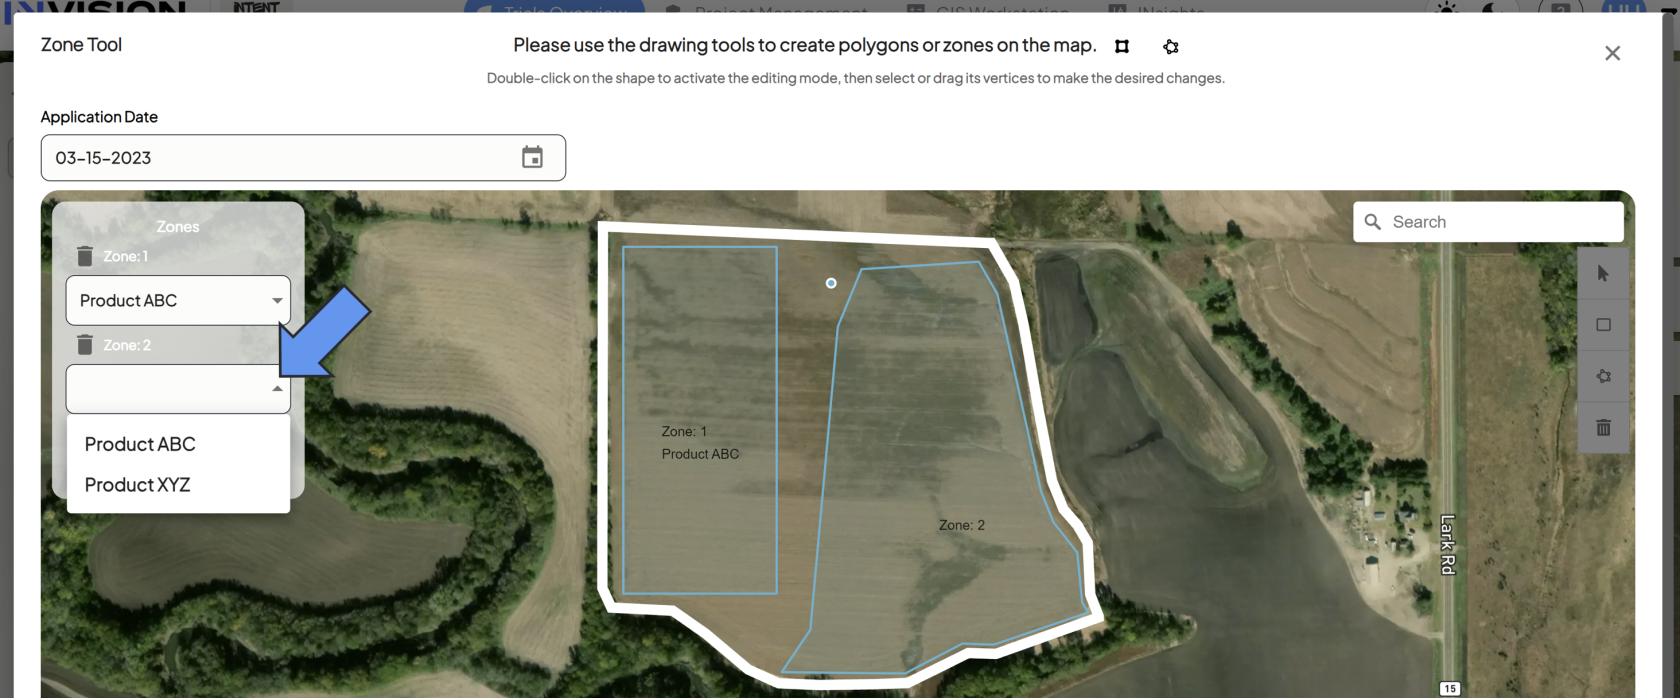](https://docs.prod.intent.ag/uploads/images/gallery/2024-03/screenshot-2024-03-26-155605.png)
7. **Submit Manual Planting/Application Data**
- Once your operation date is filled out, your zones are drawn, and products are assigned, you're ready to manually submit your data. Click the **Save** button to continue.
- If the submission was successful, you'll see a notification in the bottom left corner of View Fields, and you'll see your newly created zones on the map.
[](https://docs.prod.intent.ag/uploads/images/gallery/2024-03/screenshot-2024-03-26-161035.png)
- Some roles have the credentials to edit these zones, called *Treatment Zones.*
- If you don't see the edit icon in View Fields next to the Treatment Zones but need them edited, reach out to your contact at INTENT.
[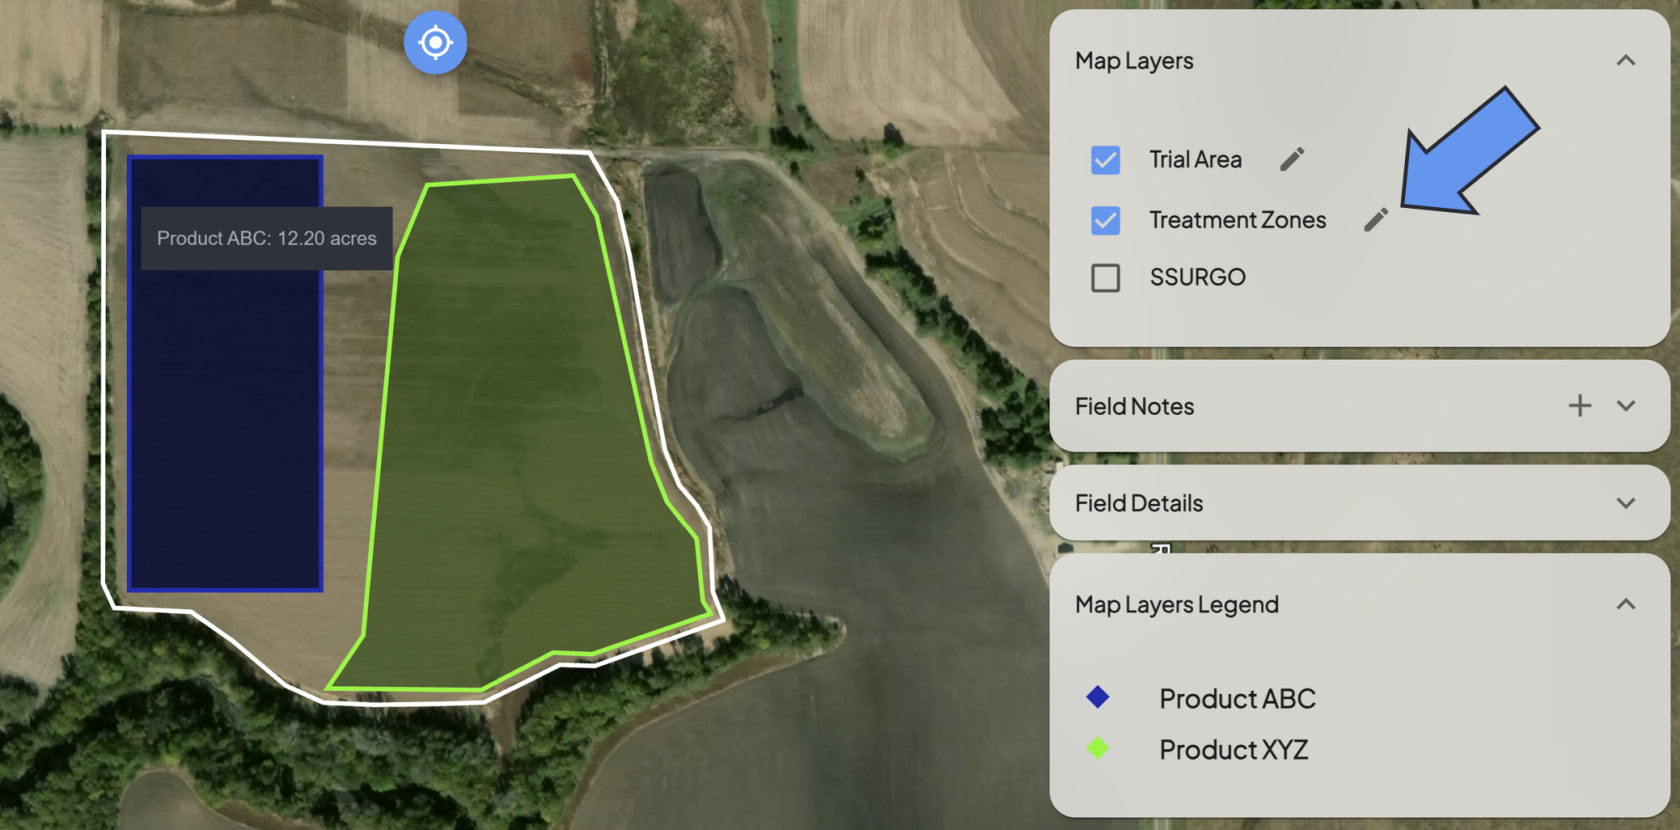](https://docs.prod.intent.ag/uploads/images/gallery/2024-03/screenshot-2024-03-26-161545.png)
For additional help, follow along with this video demonstrating how to manually create treatment zones:
##### **Harvest**
1. **Treatment Zones** are necessary to submit manual harvest data. A Planting or Application step must be completed before manual harvest data can be submitted.
2. **Select Manual Harvest **
- If you do not have a harvest machine data file, you need to submit your harvest data manually. Select the **Manual Harvest** option.[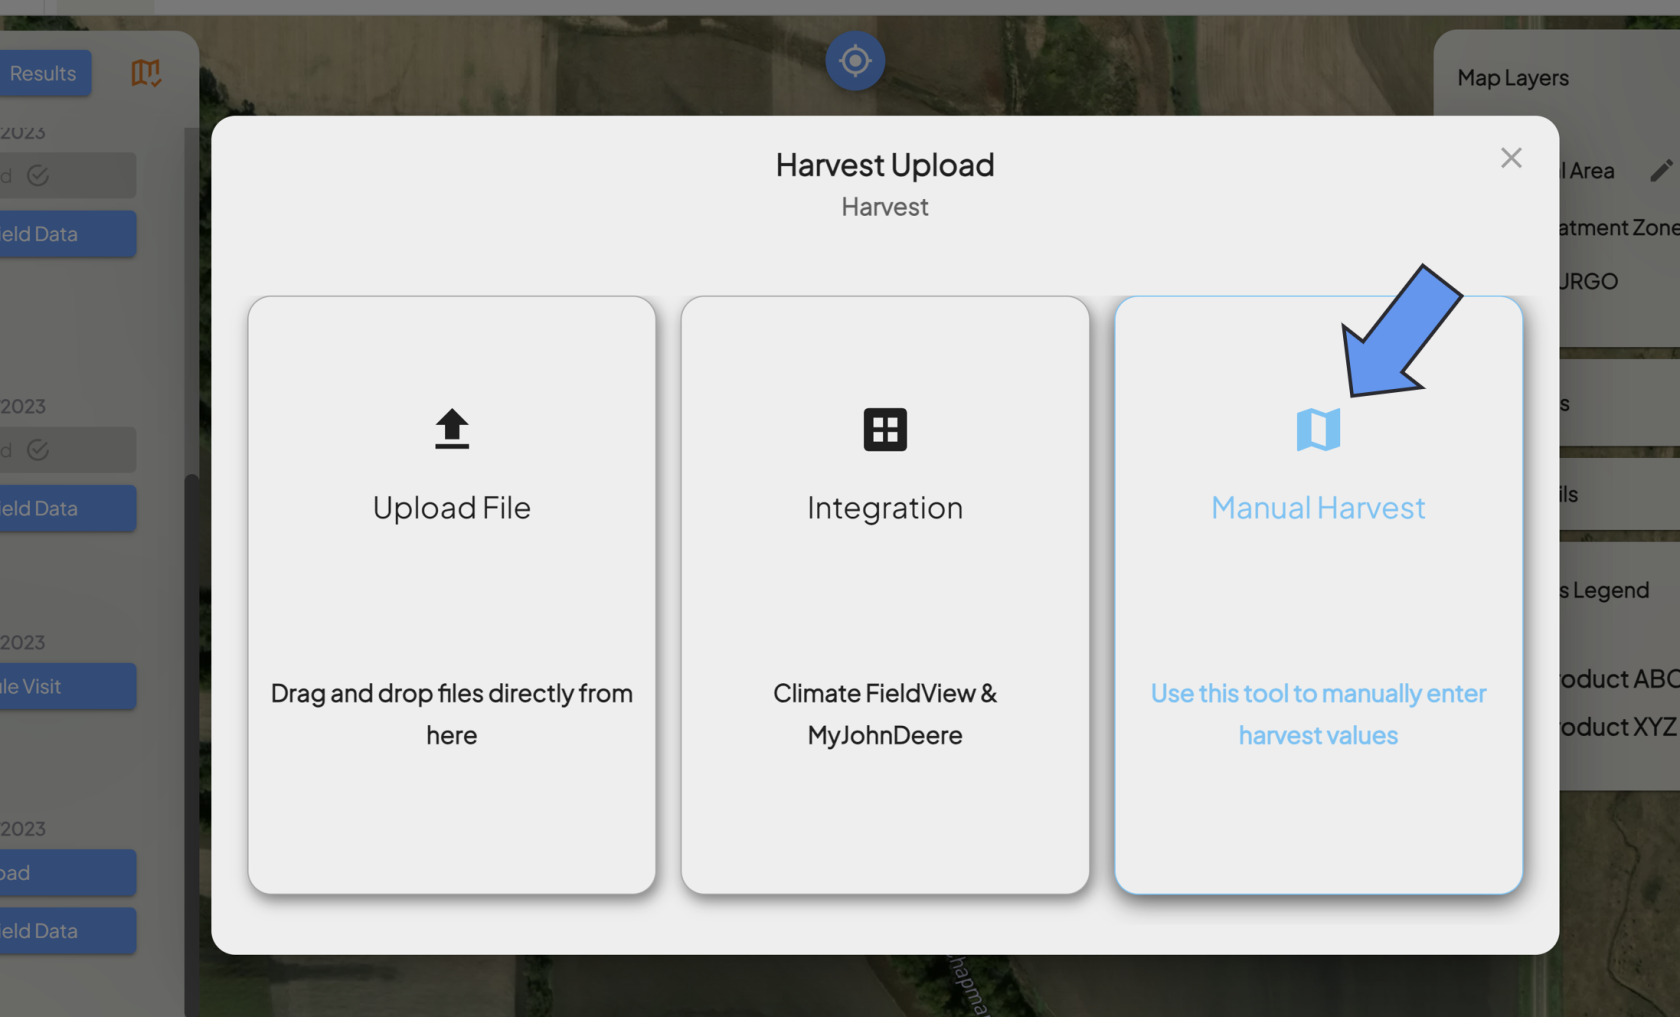](https://docs.prod.intent.ag/uploads/images/gallery/2024-03/screenshot-2024-03-26-162006.png)
3. **Select Harvest Date**
- Enter in the date when the harvest occurred.
[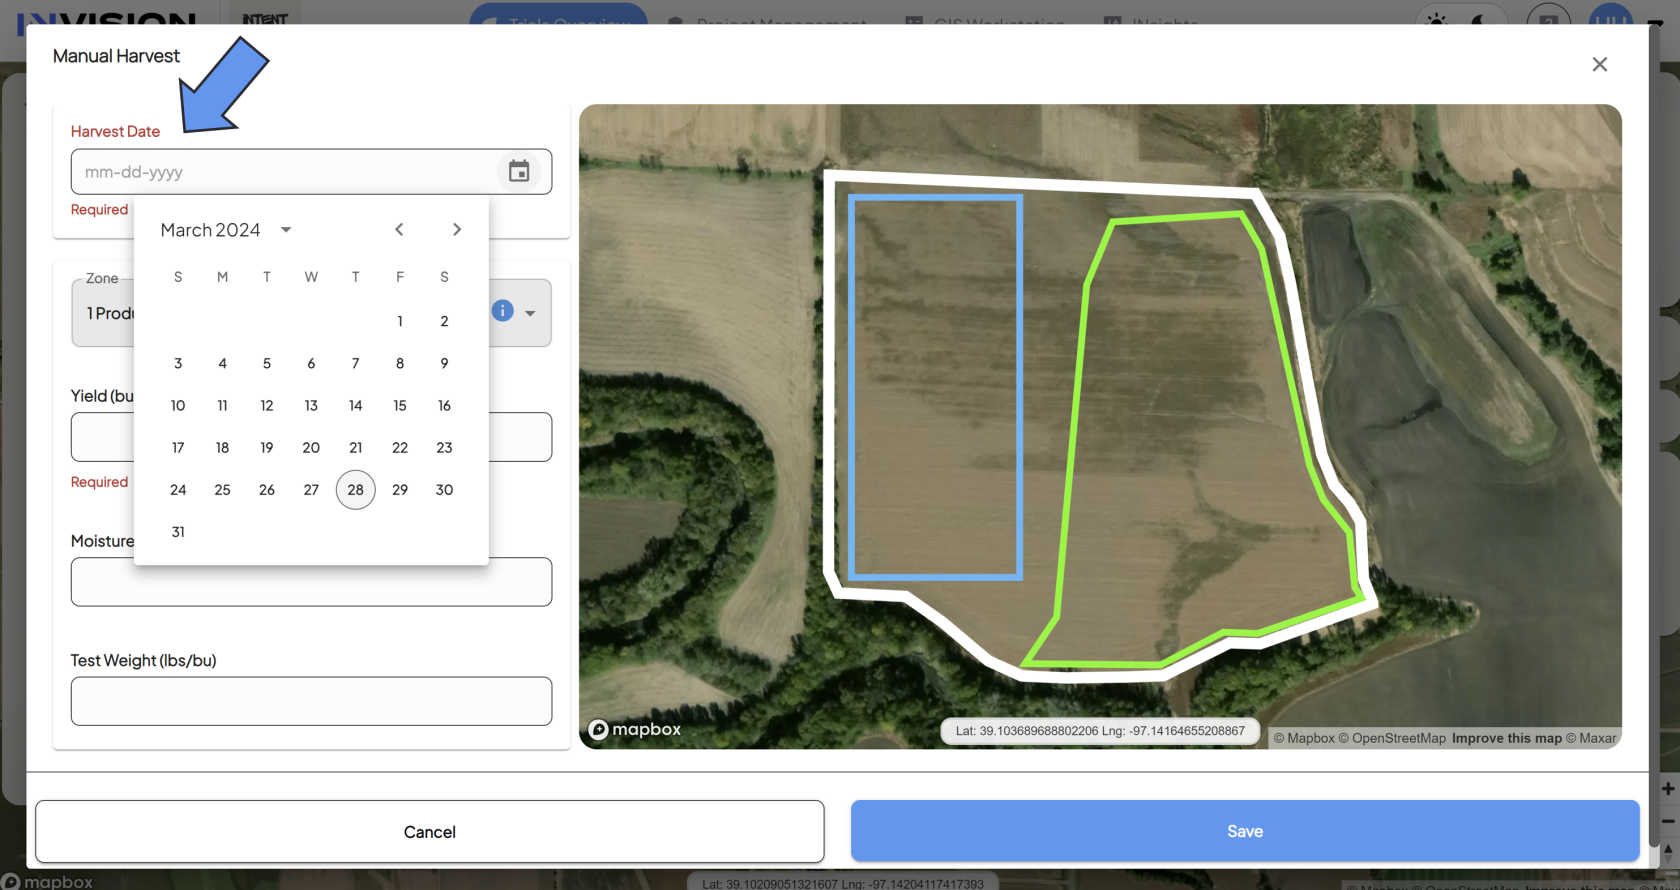](https://docs.prod.intent.ag/uploads/images/gallery/2024-04/image.png)
4. **Select the Zone/Product**
- You need to enter in data for each treatment zone in your field. Select the zone/product from the *Zone* dropdown menu.
[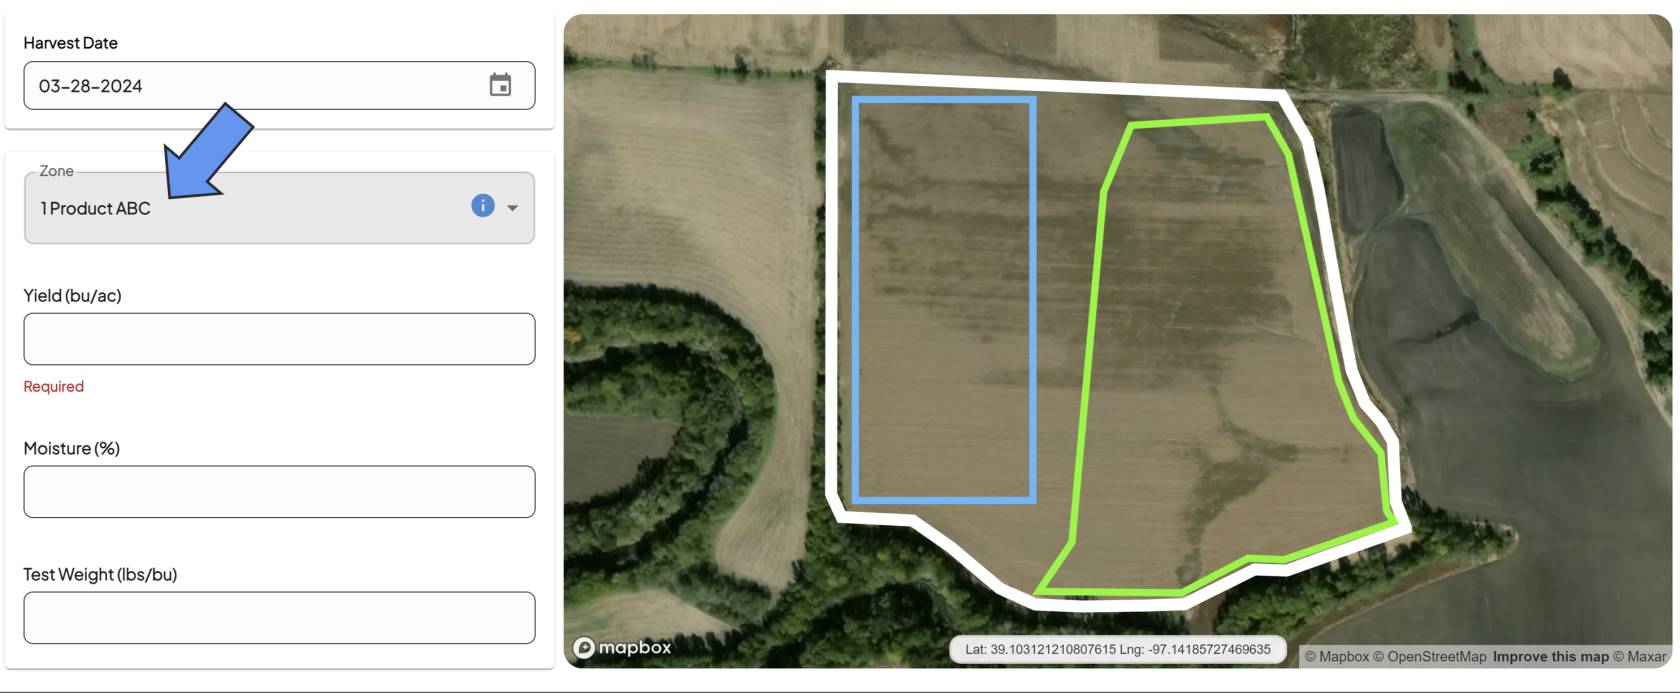](https://docs.prod.intent.ag/uploads/images/gallery/2024-03/screenshot-2024-03-28-125300.png)
1. - - The zone you're selecting will be highlighted blue on the map.
2. **Enter The Following Information For Selected Zone**
- Yield
- Moisture
- Test Weight
3. **Repeat for Each Zone**
- Select the next zone from the *Zone* dropdown menu.
[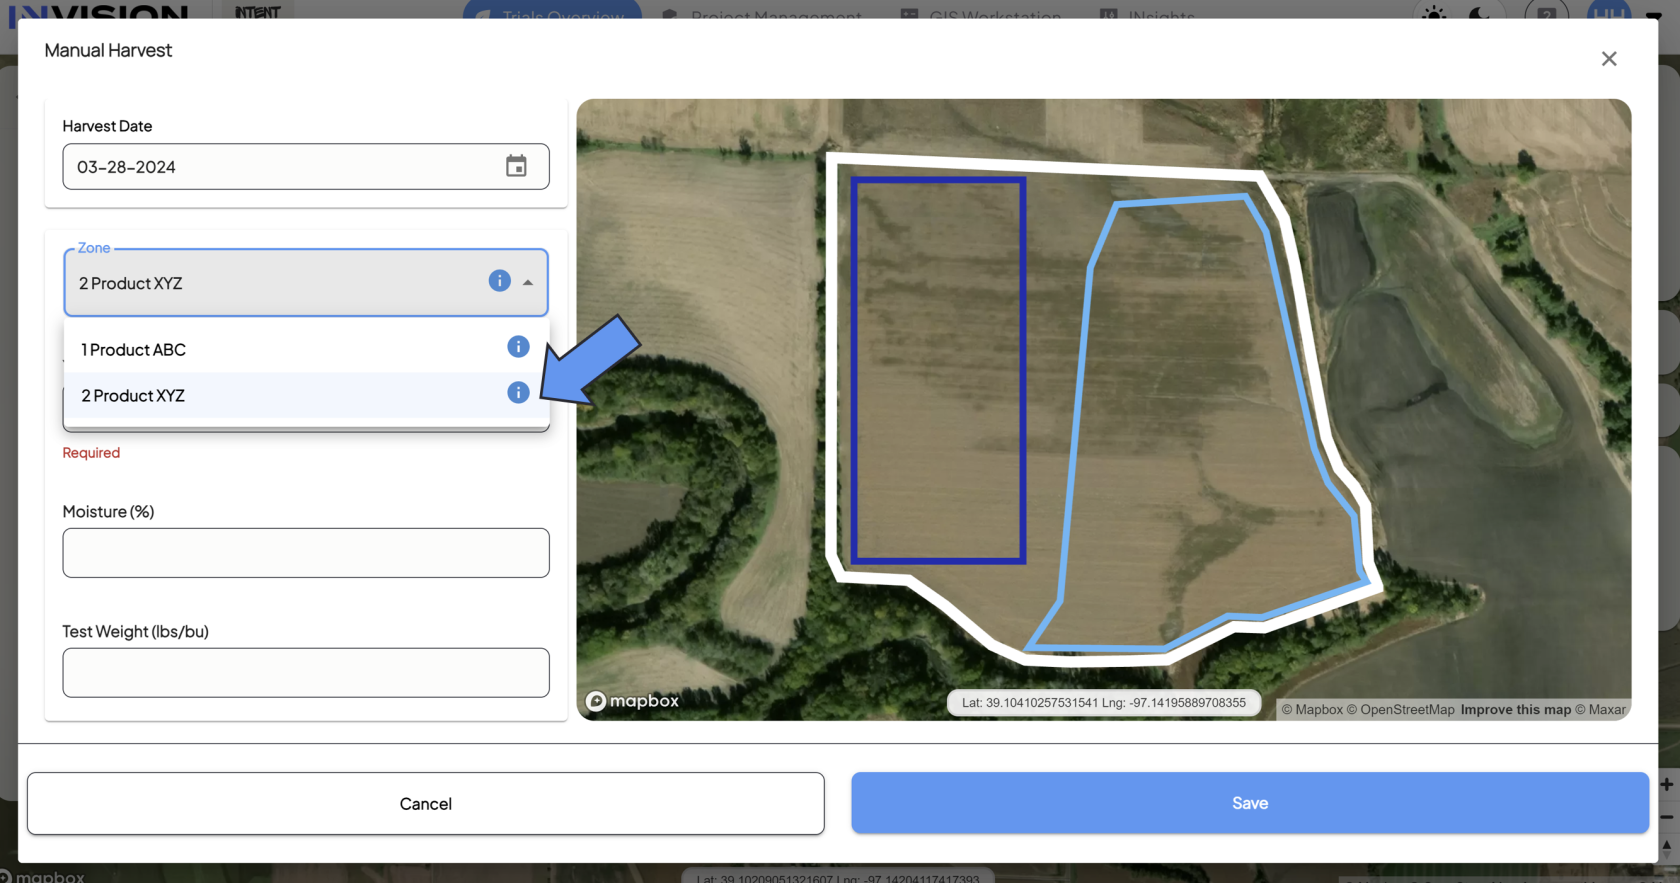](https://docs.prod.intent.ag/uploads/images/gallery/2024-03/screenshot-2024-03-28-125702.png)
- Fill out the remaining fields for that zone:
- Yield
- Moisture
- Test Weight
4. **Submit Your Manual Harvest Data**
- Once you've filled out all fields for each zone, you're ready to submit your data.
- Click the **Save** button to complete the Manual Harvest Submission.
5. **Confirm Submission**
- After you hit save, you should see a notification in the bottom left corner of View Fields if your data was saved successfully.
- You'll also see the protocol step status as Completed.
[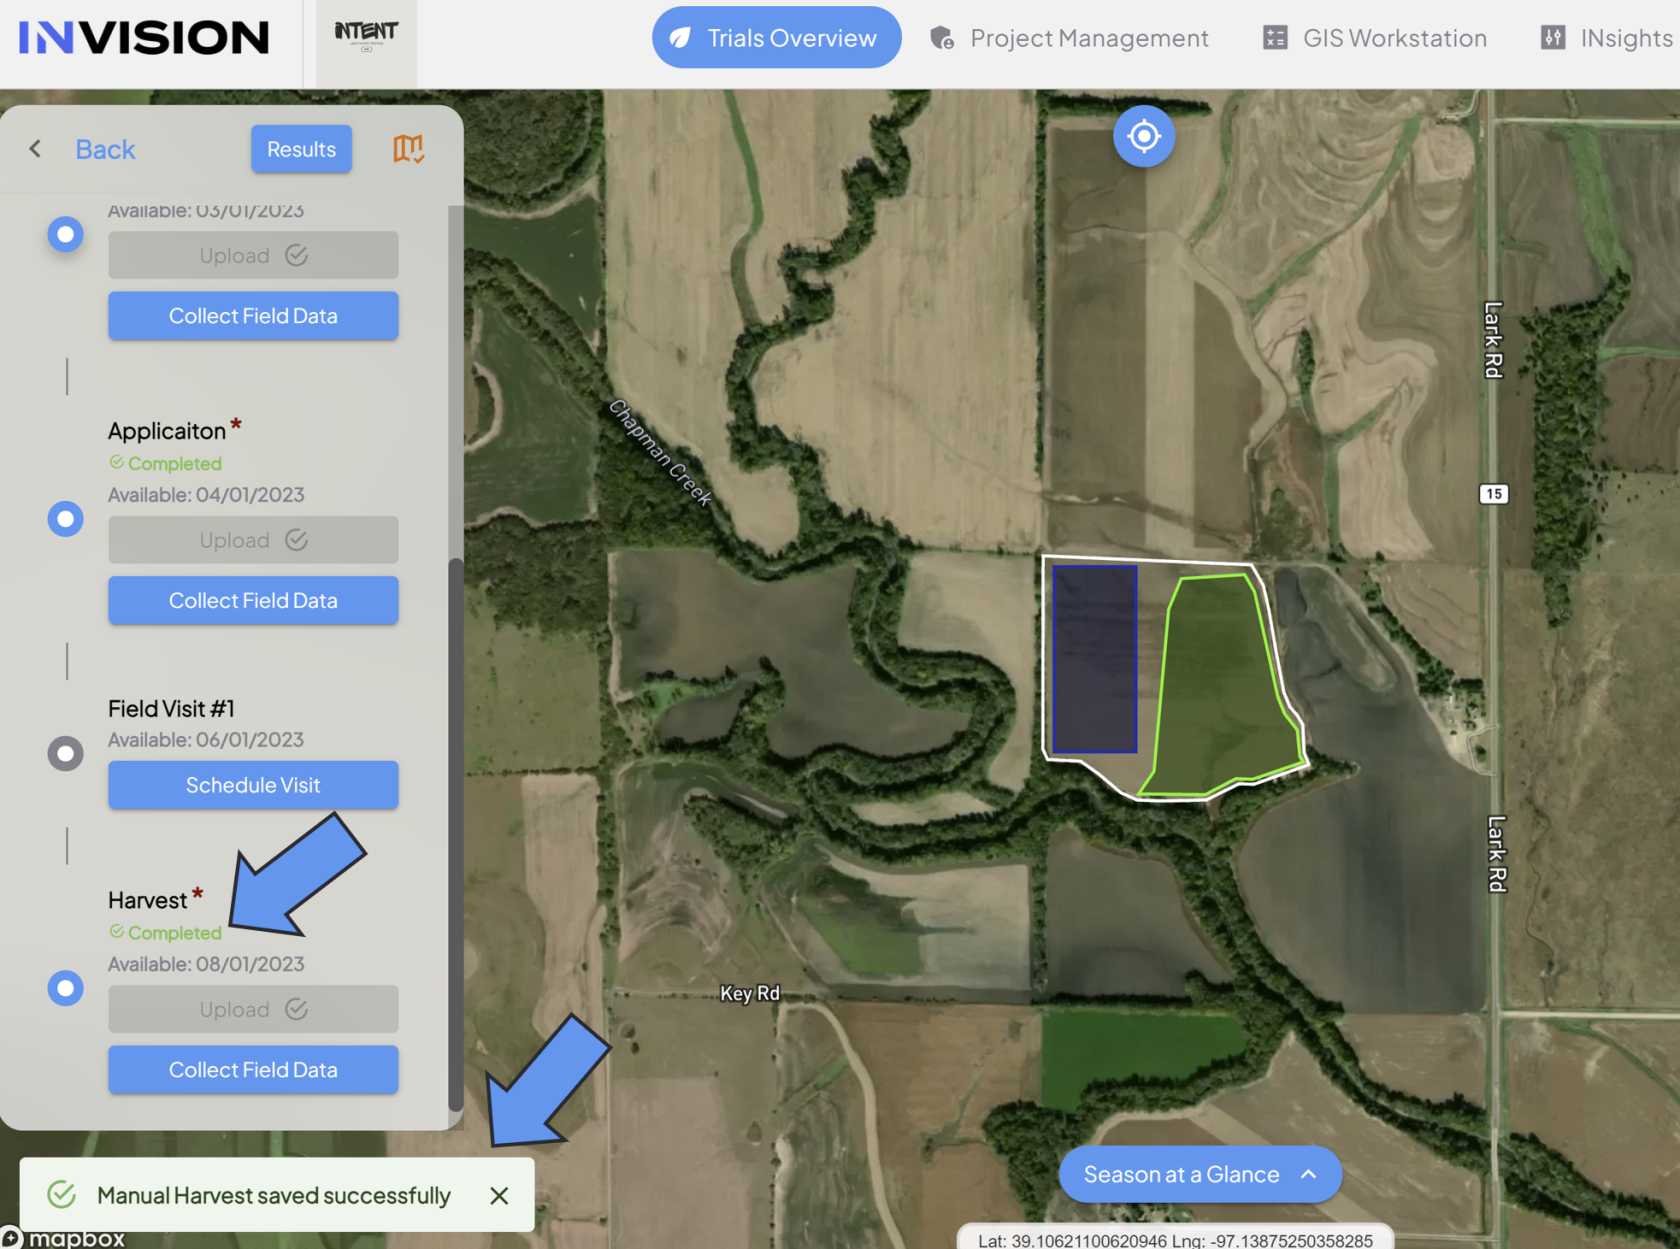](https://docs.prod.intent.ag/uploads/images/gallery/2024-03/screenshot-2024-03-28-130855.png)